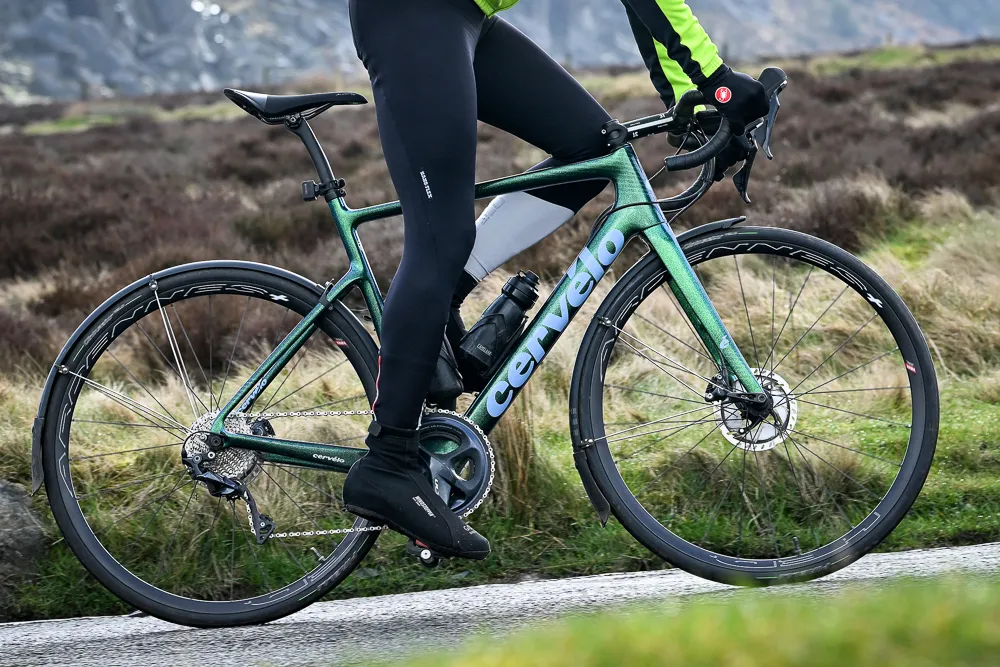
Best tubeless road bike endurance tyres 2026: performance tyres with added durability
Performance-oriented tubeless road bike tyres without the punctures, ideal for long or winter endurance events where speed and time still matter

As a road cyclist you’re used to being sold products that are lighter and more aerodynamic, with improved speed the goal. In the past, endurance tyres promised neither. Often used for winter riding they have traditionally sacrificed weight, speed and comfort in the pursuit of greater durability; heavier compounds and thicker sidewalls are adept at keeping punctures at bay and adding longevity to the tyre in general but are also heavier and less supple.
However, the best tubeless endurance tyres aim to buck this trend. While they don’t promise to compete with the best tubeless road bike performance tyres when it comes to rolling resistance and suppleness, improved technology does make them a far more attractive proposition than ever before. While they still boast extra layers of rubber and tough protection strips, which combine with tubeless sealant to guard against potholes and debris, they are now generally lighter and more sprightly than previous incarnations.
To help you find the right tubeless endurance tyre for you, we’ve selected our favourites, all chosen after many miles of testing. We also have a dedicated guide to winter tyres for road cycling as well as on for the best TPU inner tubes, should you prefer to eschew a tubeless set-up for something more traditional.
The quick list

Easy to fit, holds air well and plush to ride; there is a lot to like about the One Tubeless tyre from Schwalbe. They come up quite wide, though, which is great if you have the clearance, but older frames and rim brakes might cause problems with the larger sizes.

Almost as quick as the standard GP5000S TR, but with extra puncture protection, the AS TR feels rapid and grippy. A little more air volume wouldn't go amiss, and the price is pretty punchy.

How tubeless tyres should be; easy to fit, airtight and nice to ride. Perhaps a few per cent behind the very best in terms of ride feel, but very impressive considering their genuine endurance credentials and protective technology.

The Blackbird All Season delivers good tubeless performance, decent weight and durability, making it a good choice for high mileage riders who value longevity and puncture protection.

Pleasant to ride and straightforward to fit, the Vector 4Seasons are a decent winter/endurance option, but despite the Tubeless Complete claims, our setup needed very regular air top-ups. The comfort was good, though, and the puncture protection tech is pretty comprehensive.

Don't let the 'Race' branding fool you; while the P-Zero is from Pirelli's performance range; its durable casing will handle some light gravel and all-road riding, making it a great all-weather road tyre for the new breed of endurance road bikes.
Our pick of the best tubeless endurance road bike tyres
Best overall

Schwalbe One TLE
The tech
The One Tubeless uses Schwalbe’s RaceGuard puncture protection. This sits bang in the middle of their protection rating system with a 4/7. There is a double layer of tough Nylon fabric that sits beneath the 67 tpi carcass to prevent anything from puncturing the air chamber, in addition to the protection provided by the MicroSkin. Although the MicroSkin’s primary function is air retention to aid tubeless set-up, Schwalbe claims that it also adds a level of cut and puncture resistance across the whole carcass of the tyre.
A good range of widths is available, from 25mm to 32mm, and a choice of three colours. The test tyres were a fetching bronze colour which looked particularly smart on my green winter bike.
The set-up
Both tyres were simple to fit and popped up onto the rim instantly, holding air straightaway. In fact, I didn’t have to top these up at all for the duration of the test so they get a lot of brownie points for ease of inflation - the constant topping up needed by some tubeless tyres is a big downside.

The ride
The One Tubeless were one of the widest tyres on test. Despite their nominal 28mm width and my relatively narrow 17mm internal width rims, they measured 29.5mm once inflated to 60 psi. They looked noticeably wide on the bike, and as you’d expected, provided a nicely cushioned ride and plenty of confidence - I even let a little air out after a few rides and at 50psi they were even better with seemingly no detriment to speed. They perhaps lacked the ultimate zip of the GP5000s, maybe not surprising given their size, but they rolled along beautifully with the kind of plush feel that you’d expect, providing good isolation from the plentiful road imperfections that are commonplace on my local roads.
These were my joint favourite tyres, and I didn’t want to take them off the bike when it was time to swap them over.
Best for speed

The tech
An addition to the popular GP5000 range, the AS TR (All-Season Tubeless-Ready) is a beefed-up version of the high-performance GP5000 S TR, suitable for year-round use. The rubber is a little thicker and the familiar tread pattern slightly deeper for better wet-weather grip. There is an extra layer of 110tpi fabric used in the construction too. Puncture protection is in the form of Continental’s Vectran Breaker, a ‘synthetically manufactured high-tech fibre’ that they claim is tougher, lighter and more flexible than the nylon layer used by many tyre brands.
Uniquely in this test, the black GP5000 AS TR has reflective sidewalls for extra visibility when traffic approaches from the side (although this is an option on the Cinturato too). The cream version doesn’t get this. The lack of a 30mm option might be an issue for some.
The set-up
The GP5000 S TR is my usual summer tyre, but I have always found them pretty tight to mount, so I wasn’t looking forward to fitting a burlier version. However, a bit of deft tyre lever work and a blast from the Airshot had them popping and cracking onto the rim fairly easily; with 60psi in them, they matched their sidewall markings and measured the full 28mm. The sealant did its job and the tyres held air overnight, ready to be ridden, but did require top-ups every few days or so.

Continental GP5000 AS TR with reflective sidewalls
The ride
These tyres felt the quickest. There wasn’t any suggestion that the tyres were holding me back on the club run despite their extra protection and I would happily ride these all year round I think. The ride wasn’t quite as supple as the Ones or the Cinturatos perhaps, but they had a sprightliness that the others lacked; it may well be the extra reflective section that stiffened up the sidewalls ever so slightly, but the BlackChili rubber felt great both in terms of grip and speed whilst the Vectran breaker certainly didn’t seem to make the tyres feel turgid or dead.
Read Paul Norman's separate review here.
Best for ease of fitting

The tech
The Velo is part of Pirelli’s second-tier Cinturato range which is less race-orientated than their P Zero offerings, but should still provide good performance with some additional durability. Armour Tech combines a kevlar under-tread strip with a layer of puncture-resistant material that runs from bead to bead whilst the SmartNET Silica rubber promises wet-weather grip and enhanced mileage. Pirelli has made the sipes on the tyre deeper than usual to help clear water and proved better grip in marginal conditions. There is no 30mm option, although there is a 35mm and there are three colour choices including a commuter-friendly reflective version.
The set-up
The only tyres to go on without tyre levers, so I was a little concerned that this looseness might cause tubeless issues, but they went up and stayed inflated with no drama whatsoever. If all tubeless road tyres were this easy I’m sure that there would be many more converts. They inflated to a comforting 29.5mm with a nice round profile.

The ride
At the heavier end of the spectrum, the Cinturato Velos have plenty of rubber depth and a good width, but on the road this weight was well hidden and they rolled along nicely. The ride was supple, despite the lowly tpi count and copious rubber, helped no doubt by the added volume on offer. I never felt that they were lacking in grip even though they haven’t done a single dry mile during the test period. I think that on a wider rim and with lower pressures they’d be even better.
Stefan Abram has reviewed the 32mm version of the Cinturato Velo.
Best for durability

The tech
The tyre uses Hutchinson’s MachTread 3.0 compound in the centre with its SafeTread compound featured on the shoulders for improved grip in cold and wet conditions. As for the tread pattern, it’s best described as lightly textured.
The tyres are protected from cuts, pinch flats and punctures by a combination of a Polamide layer under the tread and three-ply, 127 tpi reinforced GridSkin sidewalls.
The 30mm tyres have a claimed weight of 360g but I measured them at just under this number by around 10g or so.
The set-up
Fitting the Blackbird All-Season tyres to a set of DT Swiss ERC 1600 Spline wheels proved to be a cinch. They went on with minimal use of tyre levers and inflated the first time round with my trusty Airshot.
For the testing period I ran the tyres at 65psi and they held the air well, requiring a weekly top-up, which is typical for a tubeless setup. Paired with the rim’s internal width of 22mm they measured 30.5mm.
The ride
With over 1,000km under their belt the tyre shows little sign of wear, with no visible cuts or damage either. Hutchinson’s suggested lifespan for this model is 6,000km and given their performance so far, which has seen them ridden in a range of conditions including cold, wet and icy, I have little reason to doubt this claim.
While the durable rubber and GridSkin sidewalls have meant I’ve yet to experience a puncture, they have resulted in a ride feel that’s less supple than some other tyres featured here, such as the Continental GP5000 AS TR or Schwalbe One TLE. That said, the fact they’ve remained unscathed despite the miserable conditions they often faced makes them an appealing offering.
Read the full Hutchinson Blackbird All-Season TLR review.
Best value endurance tyre

The tech
There are three strings to the Vector 4Seasons’ bow in terms of technology. The main puncture resistance is provided by the combination of an R:Shield strip under the tread and R:Armor bead-to-bead reinforced anti-cut material. Dynamic:Silica4 rubber offers improved wet weather grip and abrasion resistance whilst keeping rolling resistance to a minimum according to Goodyear and the tread cap is wider for a larger contact patch. The final element is the ‘Tubeless Complete’ liner that improves air retention and adds a further line of defence against punctures. Four widths and two colour options should cater to most riders.
The set-up
Installation was straightforward enough with a couple of tyre levers and a quick blast of the Airshot, but, despite the Tubeless Complete claims, both tyres needed regular top-ups before riding. Not the end of the world, but they did not hold air as well as some of the other tyres on test and it would become a bit tedious on a multi-day trip. On the plus side, both weight and width were pretty much bang on, so on wider rims, they would offer even more volume.

The ride
The Vector 4Seasons absorbed the vibrations and imperfections pretty well, making them comfortable and relaxing on longer rides. I didn’t feel that they quite had the zip or performance of the Schwalbes or Continentals, with a slightly more draggy and less responsive feel but they were by no means bad to ride - unless you rode them back-to-back you wouldn’t notice a difference I’m sure. I had no issues with grip, despite some pretty grim weather conditions and some deliberately severe brake tests.
Best wide endurance road tyre

The tech
Pirelli makes no claims about this being a gravel or all-road tyre and is listed alongside the P-Zero Race 28mm Andy tested back in 2023. Utilising the same SpeedCORE tubeless-ready casing and SmartEVO compound that can be found on many in the Pirelli range.
At 464g/16.3oz on my scales, the P-Zero’s saved me some serious grams compared to the 47mm Specialized Pathfinder Pro’s coming off the bike, but it's certainly not light by road bike or even by ‘fast-gravel’ tyre standards. Once mounted and inflated to 40 psi, the P-Zero Race gives a 39mm measured width on a 25mm internal, hookless Token rim.
The set-up
It is no secret that tyres fit differently depending on their width and the wheel dimensions. Take the direct comparison with Andy when he tested the 28mm; he actually mentions how easy it was to fit the P-Zero. Well, that certainly wasn't my experience.
Honestly, these were one of the hardest tyres I have ever fitted in 15 years of working on bikes. It took all of my years of knowledge and a very healthy dose of sheer brute force, along with two of the chukkiest tyre levers I own (credit to Muc-Off Rim Stixs; hands down the best tyre lever out there).
Once eventually mounted, they did pop up with a track pump, and I never once had any issues, holding air well throughout testing; silver linings and all that.

The ride
Seeking a balance between comfort and control over rolling resistance with the P-Zero was a little tricky out of the gate. Once I settled on a 34psi, I found this mainly worked everywhere, which is ideally what you want. The extra protection and rubber just makes them less compliant; the benefit is that they are so wide and tubeless, you can really drop that pressure without any fear of rolling a tyre or pinch puncture.
While the P-Zero did suprise with its grip and durability even on rough roads and light gravel, mounted on an endurance/older style gravel bike, its road prowess struggled to shine through. They are certainly fast; I don't think that can be denied. However, start to lean them and push through tarmac turns, and you will find the limits, even on a bike that isn't ideally suited to that type of riding.
However, given the options for wide road tyres are still limited and even more expensive than the P-Zero, it is a decent early offering from the Italian brand, just one that needs a light refinement.
How we test
A lot of tyre testing is rather subjective, as aspects like grip, feel, and rolling resistance are very hard to measure objectively. Even more measurable characteristics like puncture resistance, ease of fitting and air retention might vary on any given day, and certainly some tyres and rims work better together than others.
To negate this as much as possible, for the purposes of testing the best endurance road bike tyres, all the tyres were fitted to the same wheels using the same tools with the same sealant, and, notably, it seemed that both tyres in each pair behaved very similarly, so the conclusions should be reasonably representative.
Each tyre was inflated using an Airshot at 130psi and then ridden at 60psi, which is my usual pressure for 28mm tyres. Except for the Pirelli P-Zero TLR 40mm, not only would this have been uncomfortable at 60 psi, but given that it was on a hookless rim, this is close to the maximum pressure allowed by the manufacturer.
I used one of the best tubeless sealants, Muc-Off No Puncture Hassle, with approximately 30ml per tyre. The majority of tyres were mounted onto my trusty Scribe Race-D wheels, which have an internal width of 17mm. It is worth noting that some manufacturers claim their quoted tyre widths are based on wider rims than mine, and therefore will naturally appear a little narrow on my wheels.
Meet our testers

As a writer and photographer, Tim has been covering cycling and the outdoors industry for over 20 years. He’s been riding bikes for even longer and continues to rack up the miles both on his home roads in England’s Peak District and further afield, with the big mountains of Europe a particular favourite. All this riding makes Tim a natural fit to test the benefits of tubeless endurance road tyres.
How to choose the best endurance tyres for you?
Do I really need an endurance tyre?
Perhaps the real question should be 'Why wouldn't I use an endurance tyre?', the Continental GP5000 AS TR, Schwalbe One and Cinturato Velo tested here all offer excellent speed and comfort along with the added benefit of extra puncture protection and durability. For amateur riders in real-world scenarios, endurance tyres make a huge amount of sense. Given the increasing cost of all tyres, it is only sensible to try and eke out as much life from them as possible by choosing rubber that will last longer and provide better value.
Also, no one enjoys mending punctures mid-ride, but this goes double when the weather is cold and wet so it makes sense to use tyres that have better puncture protection during the winter months.
However, there is something undeniably special about the feel of a fast set of wheels and supple, lightweight performance tyres, which is why most of us make the swap for the summer months. Either way, the endurance options are now better than ever.
What width endurance tyre should I use?
It's no secret now that wider tyres are faster than narrow tyres, so it makes sense to choose a wider tyre - 28mm to 32mm for a tubeless road tyre is a good compromise between weight, rolling resistance and comfort. Make sure that there is sufficient space between the tyre and the frame or brake calipers though; around 4mm on either side at least.
All the tyres tested here had a nominal width of 28mm as this is one of the best-selling widths and will fit most bikes whether they have rim or disc brakes. However, the measured widths varied by over 2mm on the same rims, so make sure that the specific tyre you choose fits your frame.
A wider tyre with more air volume can be run at a lower pressure than a narrower tyre, so will go a long way towards mitigating the less supple ride of more robust endurance tyres.
What's the best compound for endurance tyres?
Endurance tyres often uses a blend of compounds to achieve the desired blend of durability and grip, while still looking to keep rolling resistance low.
Usually this means a harder and thicker compound along the centre of the tyre, with something softer on the shoulder for improved handling when cornering.
What does TPI mean?
TPI stands for 'Threads Per Inch'. It's the threads that make up the tyre's carcass and contribute to how the it rides as well as its longevity.
A higher TPI number should make for supple tyre but one that perhaps is more susceptible to damage. Conversely, a lower TPI tyre is typically durable but delivers a firmer ride feel. Endurance tyres tend to sit somewhere in the middle of the range.

Endurance tyres are perfect for winter training
Tubeless tyre top tips
Despite tubeless tyre fitting sometimes feeling like more of an art than a science, after mounting hundreds of tyres I’d like to think I have a pretty high success rate. Here are my top tips for a painless experience.
1. If you are starting with a new rim and need to fit the tape, make sure it is wrapped very tightly. Keep the tension on as you stick it down and follow the tape manufacturer’s instructions about how much to use.
2. If you are replacing an existing tubeless tyre DON’T clean the rim up too much. A bit of liquid sealant around the edge of the rim will help the tyre pop onto the rim more easily. Do clean up an excess sealant or dried residue though.
3. Don’t forget to check the tyre’s rotation direction before mounting, and ensure that the tyre logo and valve are aligned (if you are that way inclined).
4. Aim to finish mounting the tyre at the valve, and push the valve up into the tyre at the end to make the final stage easier.
5. If the tyre is being stubborn, make sure that the tyre beads are sitting in the rim bed all the way round the wheel to create as much slack as possible.
6. Another tip for difficult tyres is to leave them by a radiator for a while before fitting to make them more supple - a brand new tyre and a cold garage or shed is the hardest combination.
7. After mounting, prise a small gap with a couple of tyre levers to add the sealant, or remove the valve core and add the sealant through the valve. You can skip this step though and add sealant afterwards once good inflation has been achieved if you prefer.
8. Check that the tyre’s beads sit on either side of the valve, not over it, and that the valve is very securely tightened in place for a good seal.
9. Use a tubeless tyre inflator for easier inflation. You can first try it through the valve with the core in place first of all, but if that doesn’t pop the tyre onto the rim then you can remove the valve core and do it that way.
10. Once the tyre has popped into place, if the valve core is in place and the tyre has sealant, add a few more psi to help the sealant find any holes (but don’t exceed rim or tyre limits) and then remove the pump/inflator and spend a few minutes spinning, shaking and generally jiggling the wheel so that the sealant is well spread out through the tyre.
11. If you had to remove the valve core, then add a few more psi and leave the system together with the tyre inflated for a couple of hours to help the tyre settle onto the rim. You should then carefully deflate the tyre with your fingers crossed that it doesn’t pop off the rim, then replace the valve core and inflate with a track pump.
12. Bonus tip - if you are really struggling to get the tyre to pop onto the rim, then start by inflating it with an inner tube. This should stretch the tyre onto the rim and even when you have removed the inner tube, at least one bead will be left in place. This is much better done before any messy sealant has been used though!