Six easy and useful ways to repurpose and reuse bicycle components
Don’t toss those old bike parts — here are some ways to give them a second life
The latest race content, interviews, features, reviews and expert buying guides, direct to your inbox!
You are now subscribed
Your newsletter sign-up was successful
Regular bike maintenance includes checking your drivetrain, brake pads, tires and bearings for wear. When it’s time to replace wearable parts, instead of discarding them turn them into useful crafts.
If you search the internet for repurposed bike components, you’ll likely find a lot of seemingly complicated projects that maybe sold for more than the cost of the items when new. With a few simple bike tools and basic bicycle maintenance skills, you can repurpose worn, used, no-longer-useful bike parts to make some cool crafts for yourself or for others.
The components that experience the most wear and that are most likely to need regular changing are brake pads and tires. There’s not too much you can do with worn brake pads, and even worn tires can be challenging to work with. An opportunity to reuse components is when converting a road bike to a gravel bike or vice versa. You can salvage worn drivetrain components, cockpits parts, and even whole framesets and give them new life without adding to landfills. To keep grime at a minimum, thoroughly clean old bike parts in an ultrasonic cleaner after removing them from your bike.
DIY Bottle Opener
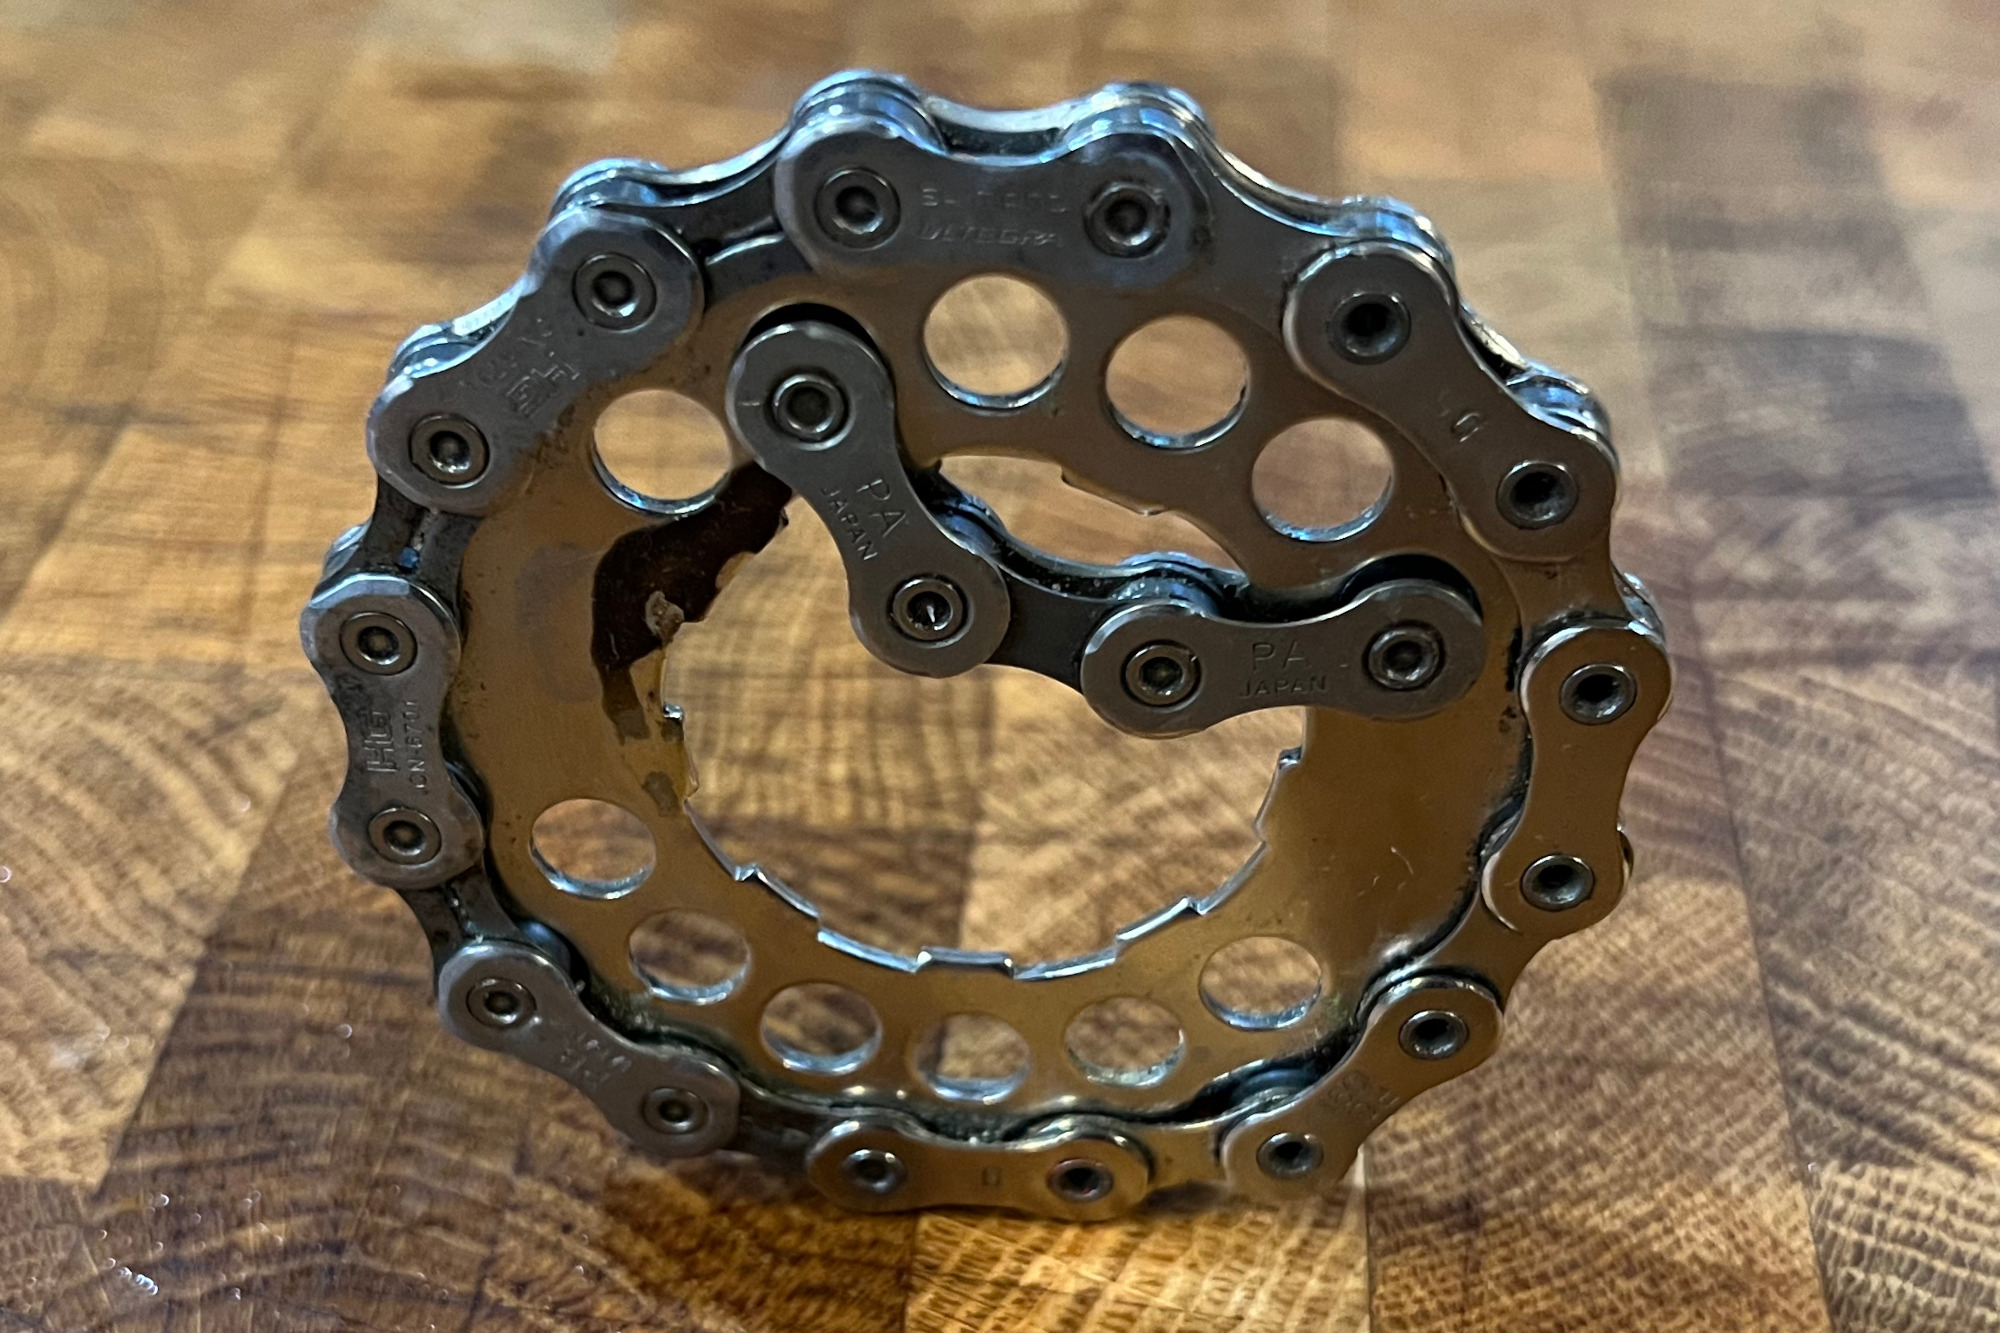
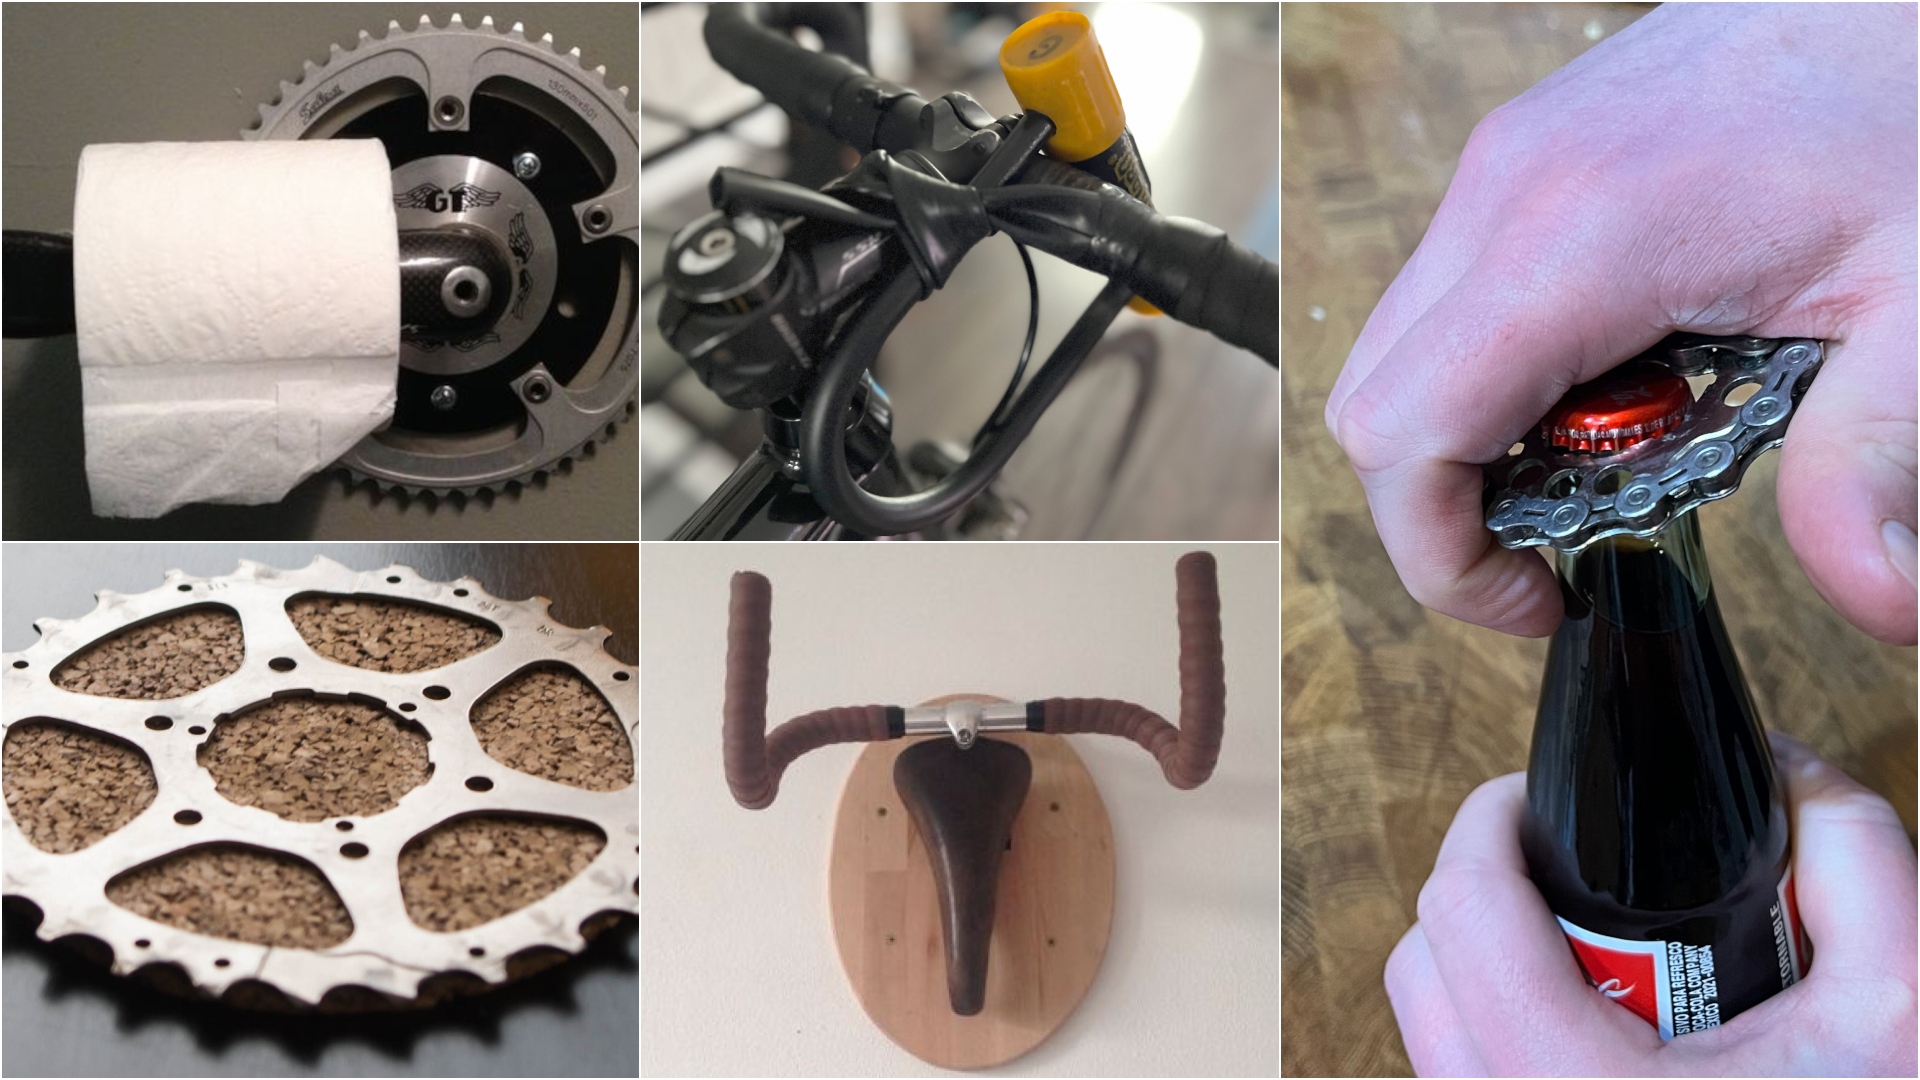
If you regularly check your drivetrain for wear and replace your chain and cassette to ensure optimal shifting, you can repurpose the cogs and the chain as a bottle opener. Using a chain tool, create a length of chain that perfectly fits the circumference of the cog — the 16 tooth is a good size for most hands —and secure it around the cog with the same tool. This will be the handle, and will protect hands from the cog teeth. On the inside of the cog (that would fit on the hub carrier) affix three links of chain to create the bottle opener edge.
DIY Drink Coasters
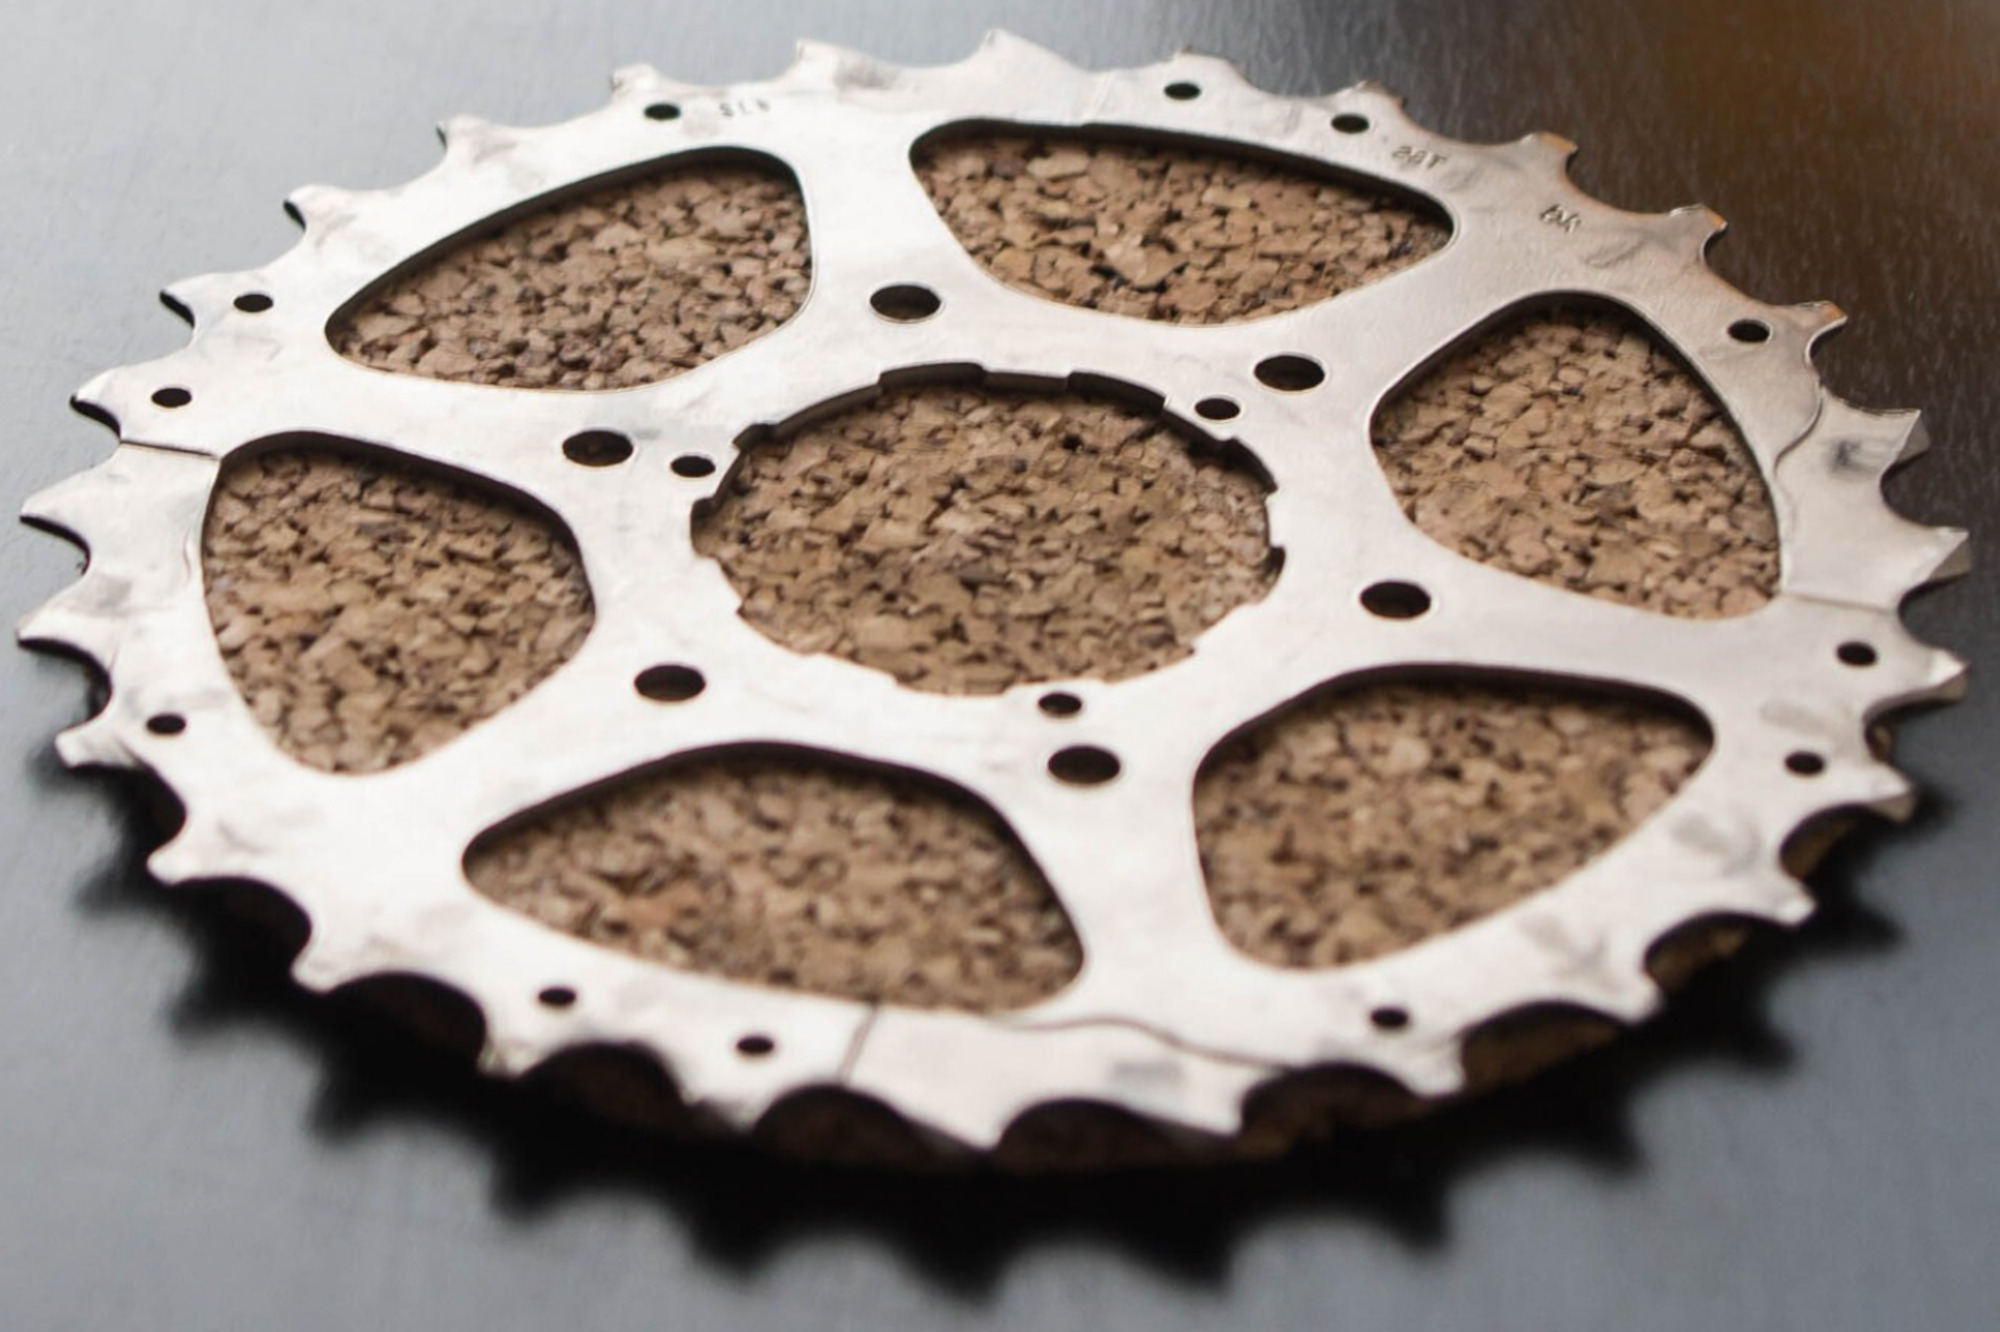
Another use for worn cassettes and chains are drink coasters. Create a set of drink coasters with worn 28-, 30-, or 31-tooth cogs to allow for the widest range of glass or bottle sizes, without going so large as to take up too much counter or table space. Use an upside down pint glass and a Sharpie to trace a circle onto a large, thick cork pad. Carefully use a utility knife or kitchen shears to cut the circular cork section free. Use rubber cement or other non-toxic adhesive to bond the cork to the bottom of the cog. If you want to get fancy and add additional visual interest to the coaster, secure a length of chain around the cog using a similar method used for creating the bottle opener. You’ll want to hand wipe these clean after use — instead of tossing into the dishwasher — to prevent rust.
Pro tip: Visit a local bike shop to source additional chains and cogs. Tip the mechanics by offering them a homemade bottle opener with a round of beers.
Toilet paper dispenser
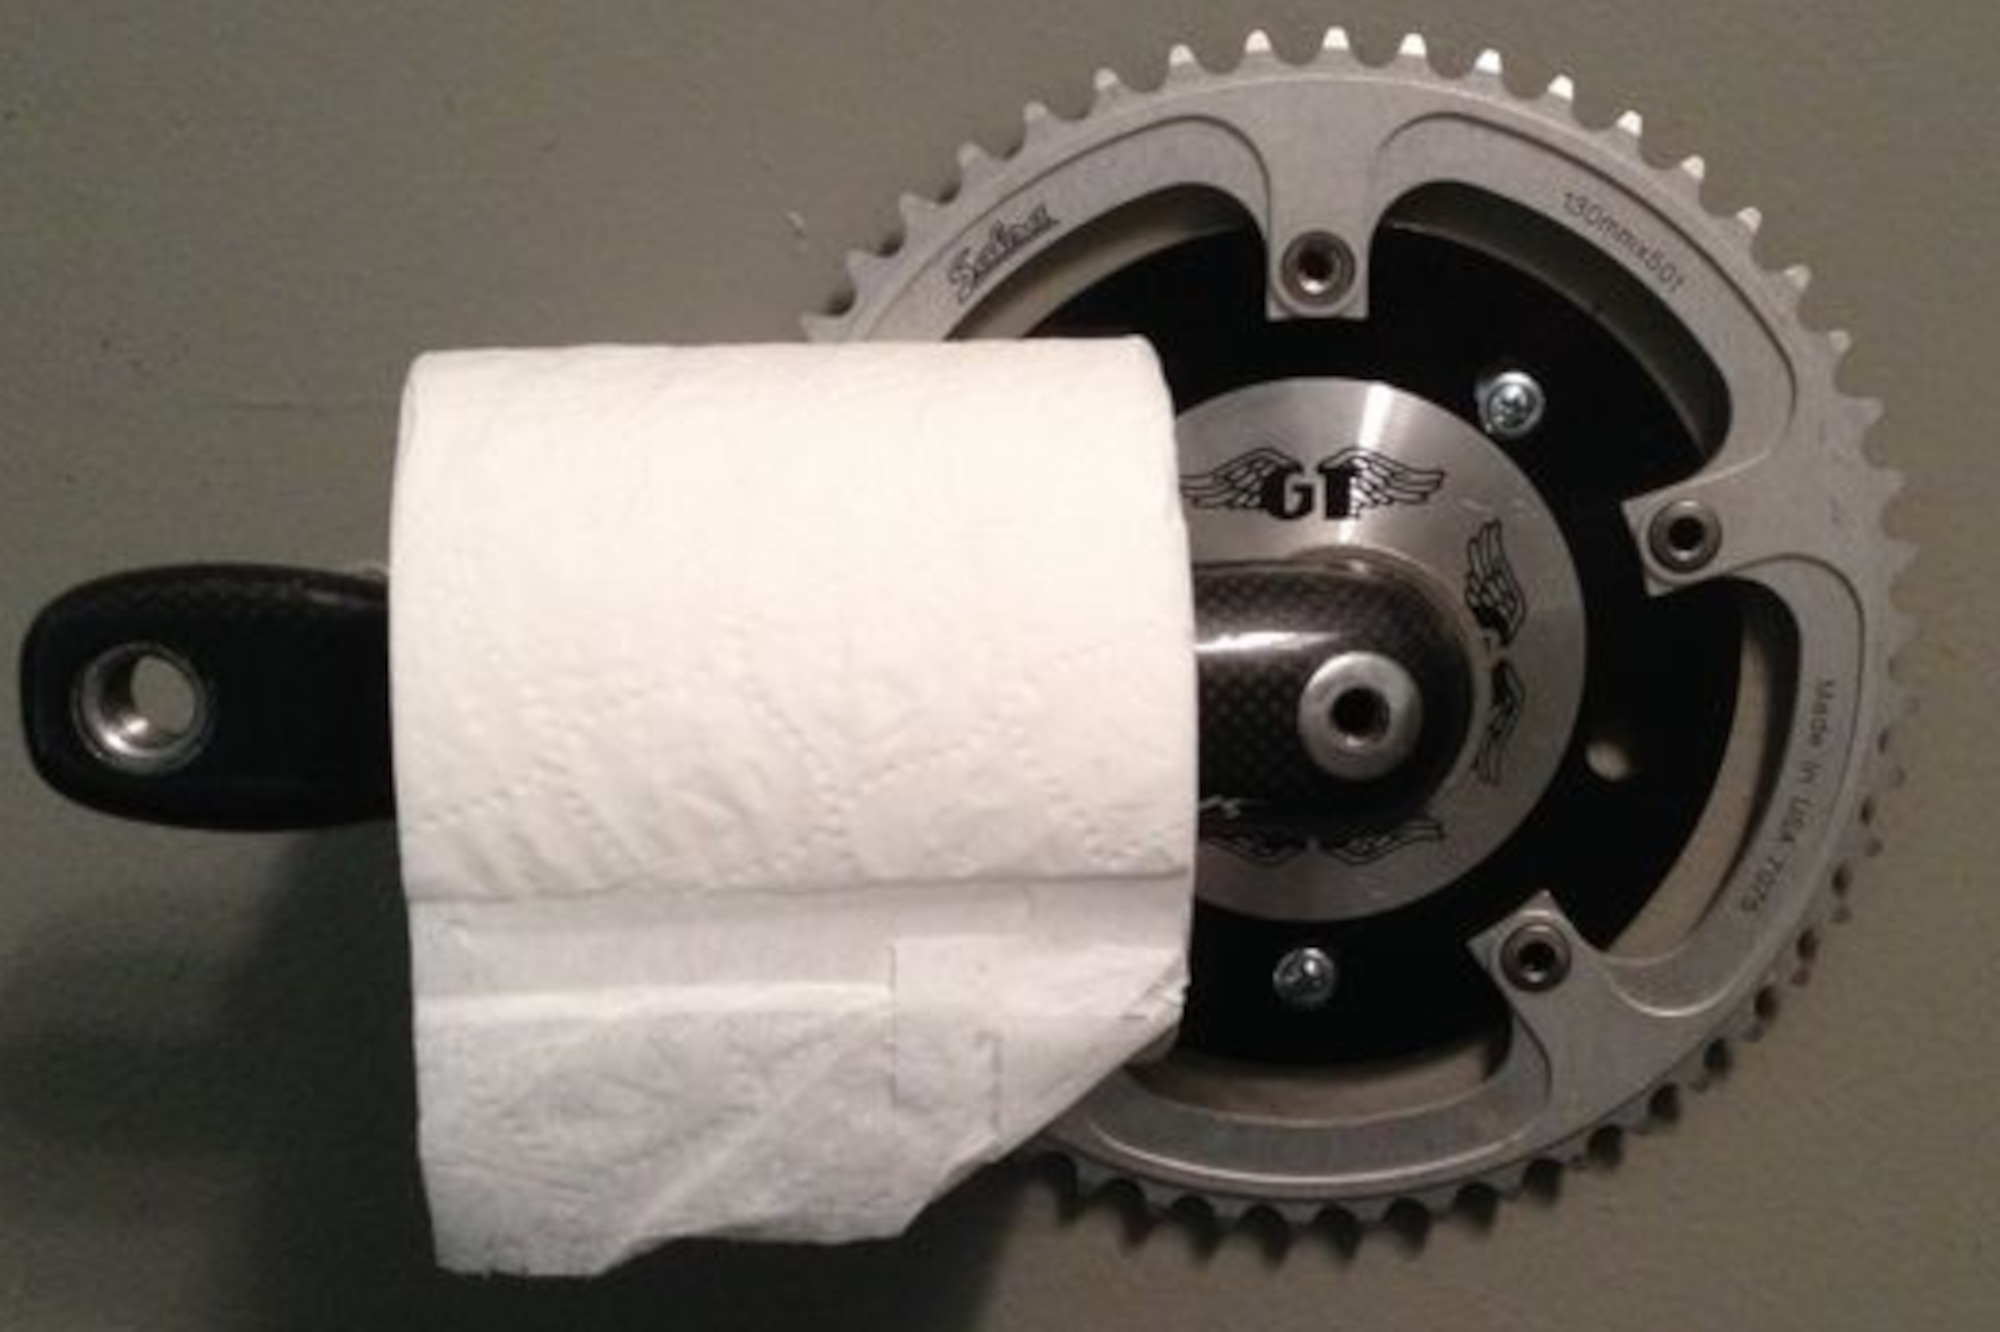
Repurpose cranks into toilet paper dispensers. To allow for full rolls of toilet paper to be placed onto crankarms, affix the crank to a pre-cut mount (which for the cost of a cup of coffee can be bought from a home improvement store), with small-diameter bolts threaded through the chainring bolts and secured to the back of the wooden mount into which you’ve drilled recessed notches. Affix this mount to a stud in your bathroom wall within easy reach when seated on the toilet.
The latest race content, interviews, features, reviews and expert buying guides, direct to your inbox!
U-lock Securing Strap
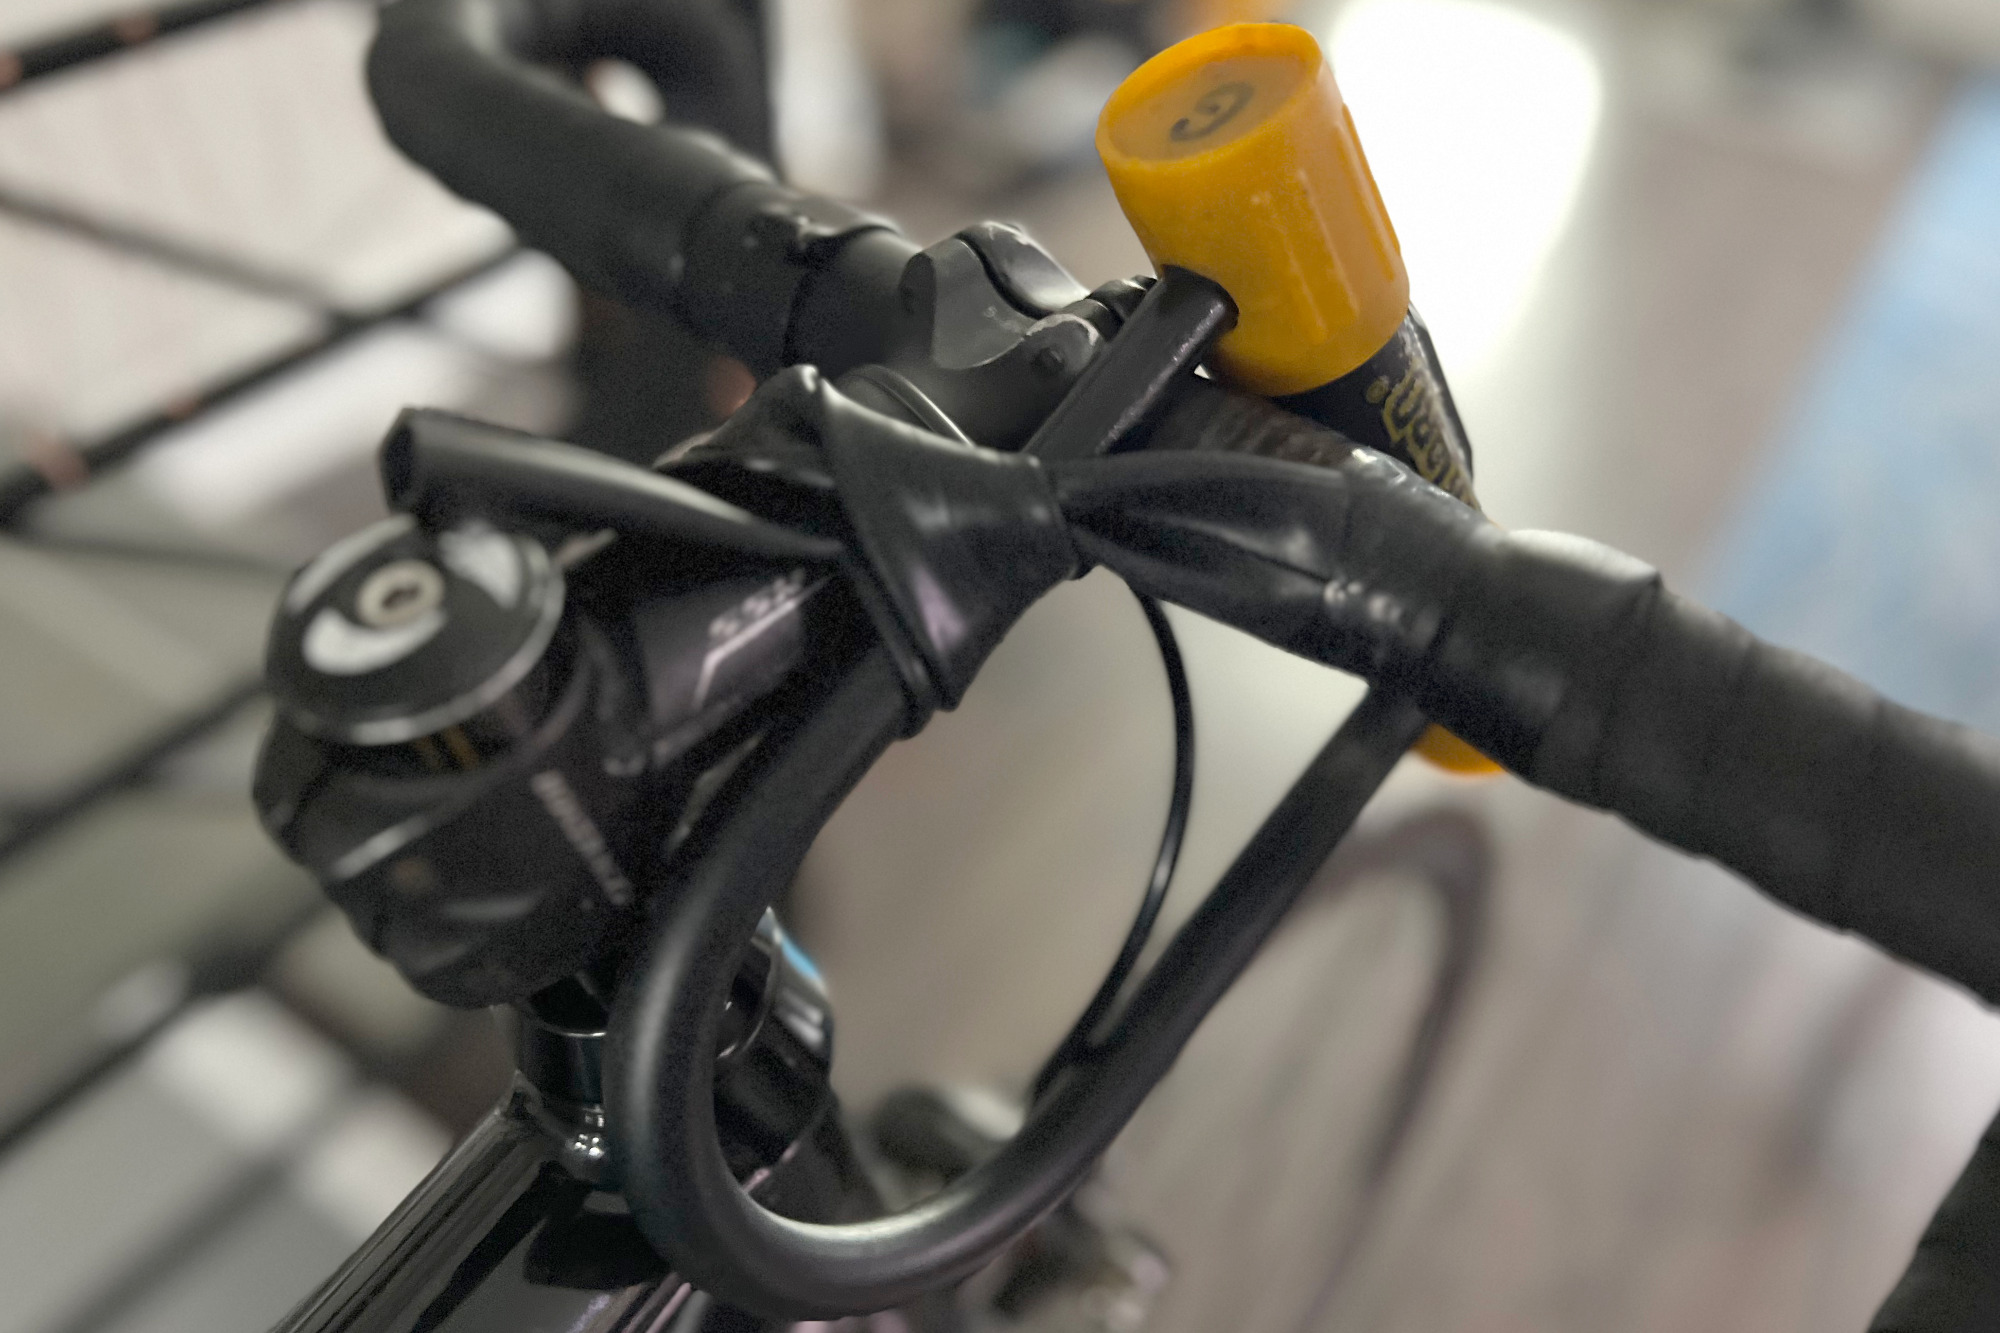
For those who have not yet ditched inner tubes and moved to a tubeless wheel and tire setup, there are a few straightforward uses for tubes that can no longer serve their designed purpose. Sure, you can patch a tube a few times but after a few repairs it’s a good idea to swap in a new, reliable inner tube. If you have a dedicated commuter bike on which a lock spends most of its time, you can use the old tube to secure the lock so it won’t rattle around while riding. A repurposed inner tube may be more reliable at securing a lock to your bike than the factory-supplied lock bracket. Put a few wraps of electrical tape around the section of handlebars where the u-lock rests to silence the metal-on-metal contact point. It’s not recommended to secure a metal lock to a carbon frame or carbon components with this method.
Coat hanger or towel hooks
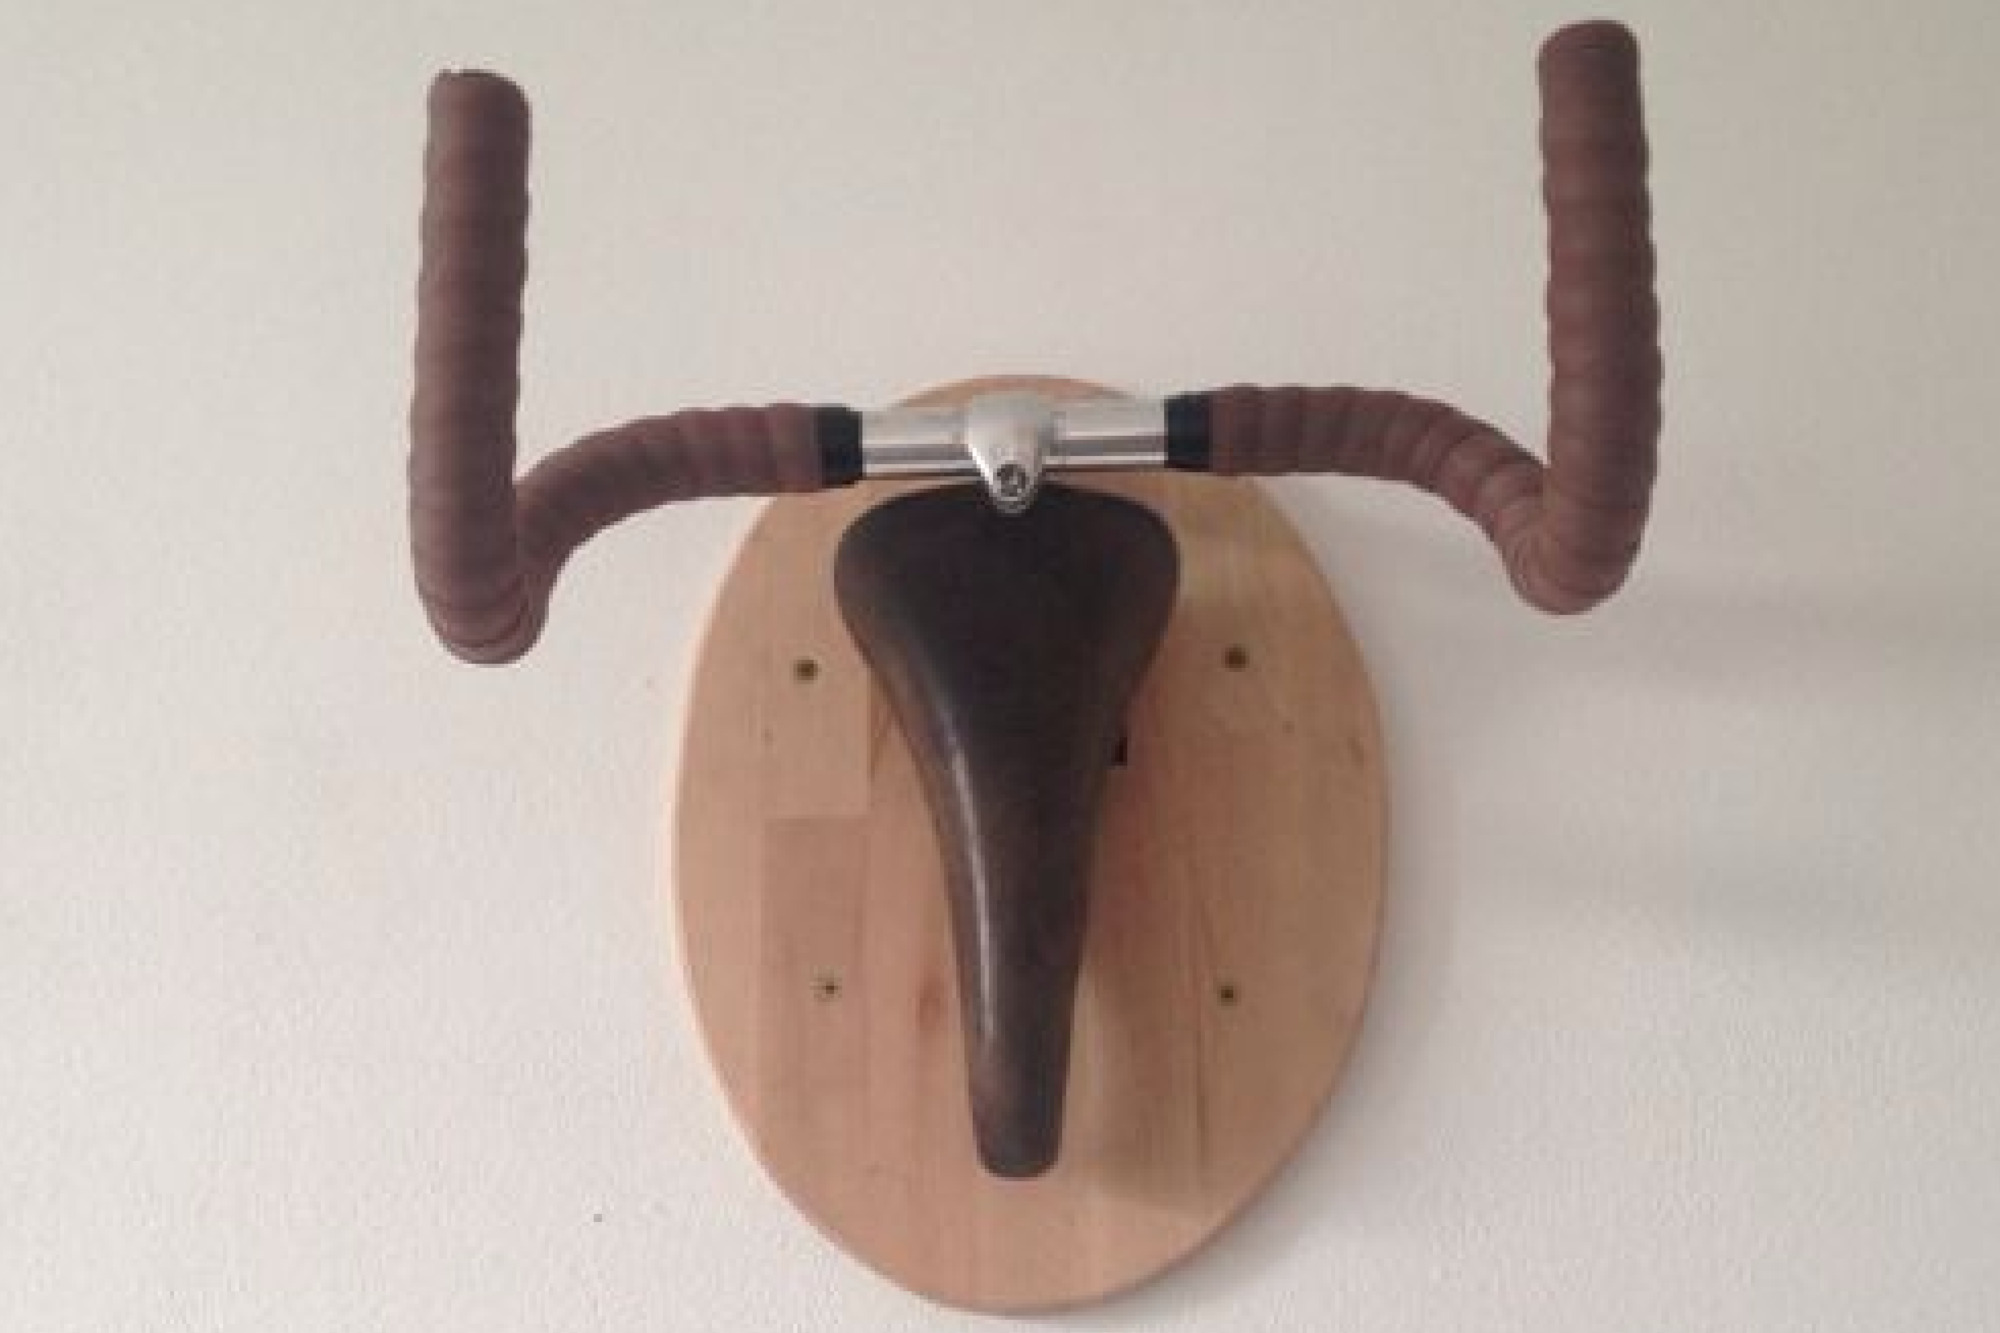
If you’ve got a saddle, stem, and drop handlebars that are no longer needed make a coat hook or a towel hanger. Like the toilet paper dispenser, you’ll want to get a wooden disc or similar mount to attach the bike components and then hang on a wall or the back of a door. If located in a high-moisture area, throw a light layer of varnish on both sides of the mount to prevent moisture penetration. Prevent snagging clothing or towels by wrapping the bars in new bar tape in complementary or contrasting colors. For a look that hints at an animal skull: After attaching the handlebars to the stem with a hose clamp, affix the saddle and bars to the mount. Hang the mount with a hook or use short screws to attach to the backside of a door or wall stud so you won’t have to mess with drywall screws.
Greg has been on and around bikes since his early teens. He got his start when tubulars and freewheels were still a thing, while working at local bike shops, and dabbling in the Philadelphia racing scene. Greg still geeks-out on bikes, cycling gear, apparel, and accessories as much now, as when he first discovered the sport. Greg has been on staff at VeloNews and Bicycling, and also was a contributor at Active.com.