MSR Freelite 3 tent review
Lightweight and low bulk, the Freelite 3 is perfect for bikepacking with friends
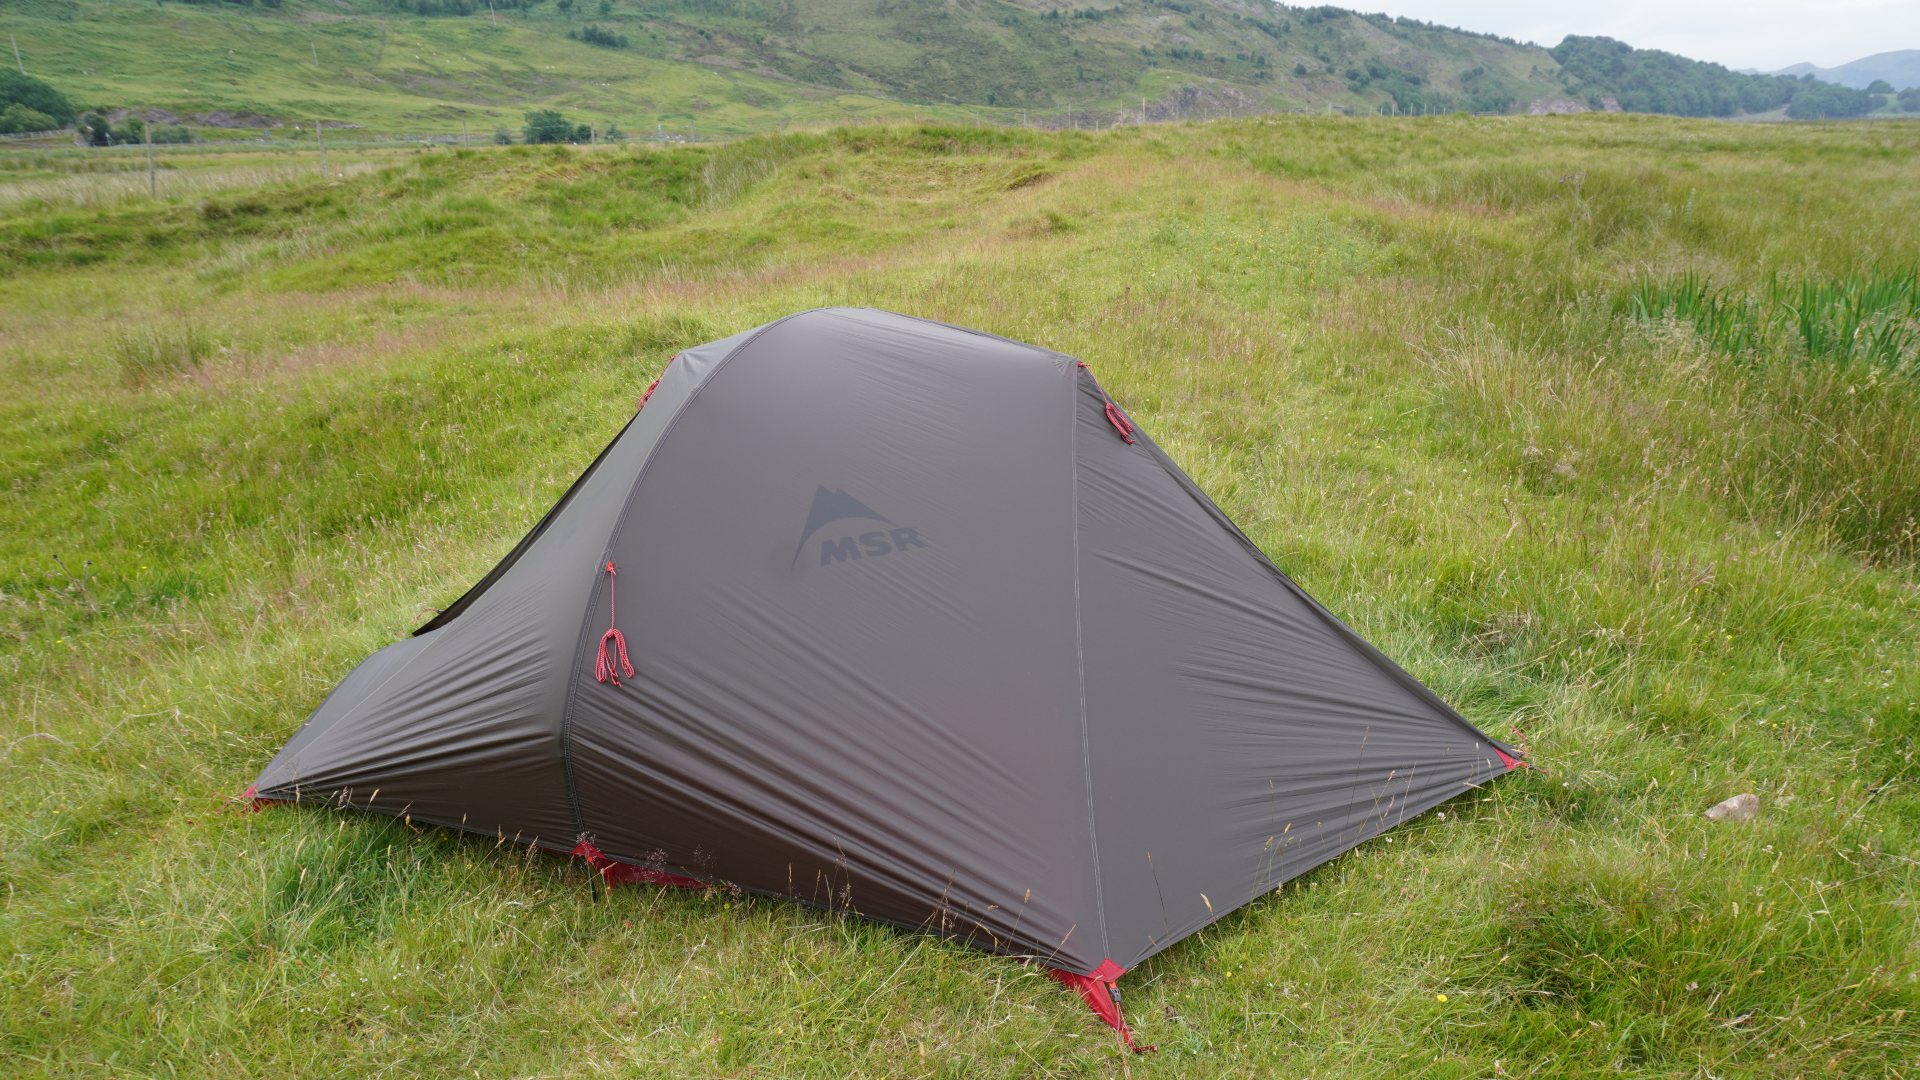
The MSR Freelite 3 is an excellent tent for bikepacking. Lightweight and with low bulk, it has a good pack-size in its original bag – while also being able to be tucked away inside a 6L half-frame bag. When travelling as a pair, it offers a luxurious amount of space but it’s also comfortably capable of fitting a trio.
-
+
Lightweight
-
+
Low bulk
-
+
Stable in high winds
-
+
Two entrances
-
+
Discreet (in the Green colour option)
-
-
Poles remain fairly long when fully folded
-
-
A little delicate
You can trust Cycling Weekly.
MSR stands for “Mountain Safety Research” and the company has been manufacturing highly engineered kit for outdoor adventures since 1969. The FreeLite 3 fits into the range as MSR’s second lightest three-person tent – a little cheaper and without some of the sacrifices of the superlative Carbon Reflex 3 Featherweight tent.
We think bikepacking is most fun when done with friends. Whilst a bivvy bag might be the simplest and lightest solution for a solo ride, a three-person tent can provide a luxurious space for a pair, while also giving the option to go as a trio. Evenings are so much more pleasant when you can play card games out of the wind, rain and midges, in the shelter of a tent.
The construction: MSR Freelite 3 tent
It is well worth having a go at putting the MSR Freelite 3 up in your garden (or a park) to get the hang of it before heading out on a trip.
It’s not complex or difficult to do once you’re familiar with it. But on the first try, it’s fair to say it’s not the most intuitive – and definitely not something you want to be figuring out when it’s dark and raining.
With this tent all the poles are connected together, which makes it harder to lose any, but does make setting up a little more cumbersome. After getting the poles all full extended, you’ll need to attach the two shorter poles (which fork off from the junction) to the metal hooks at two corners of the short side of the tent.
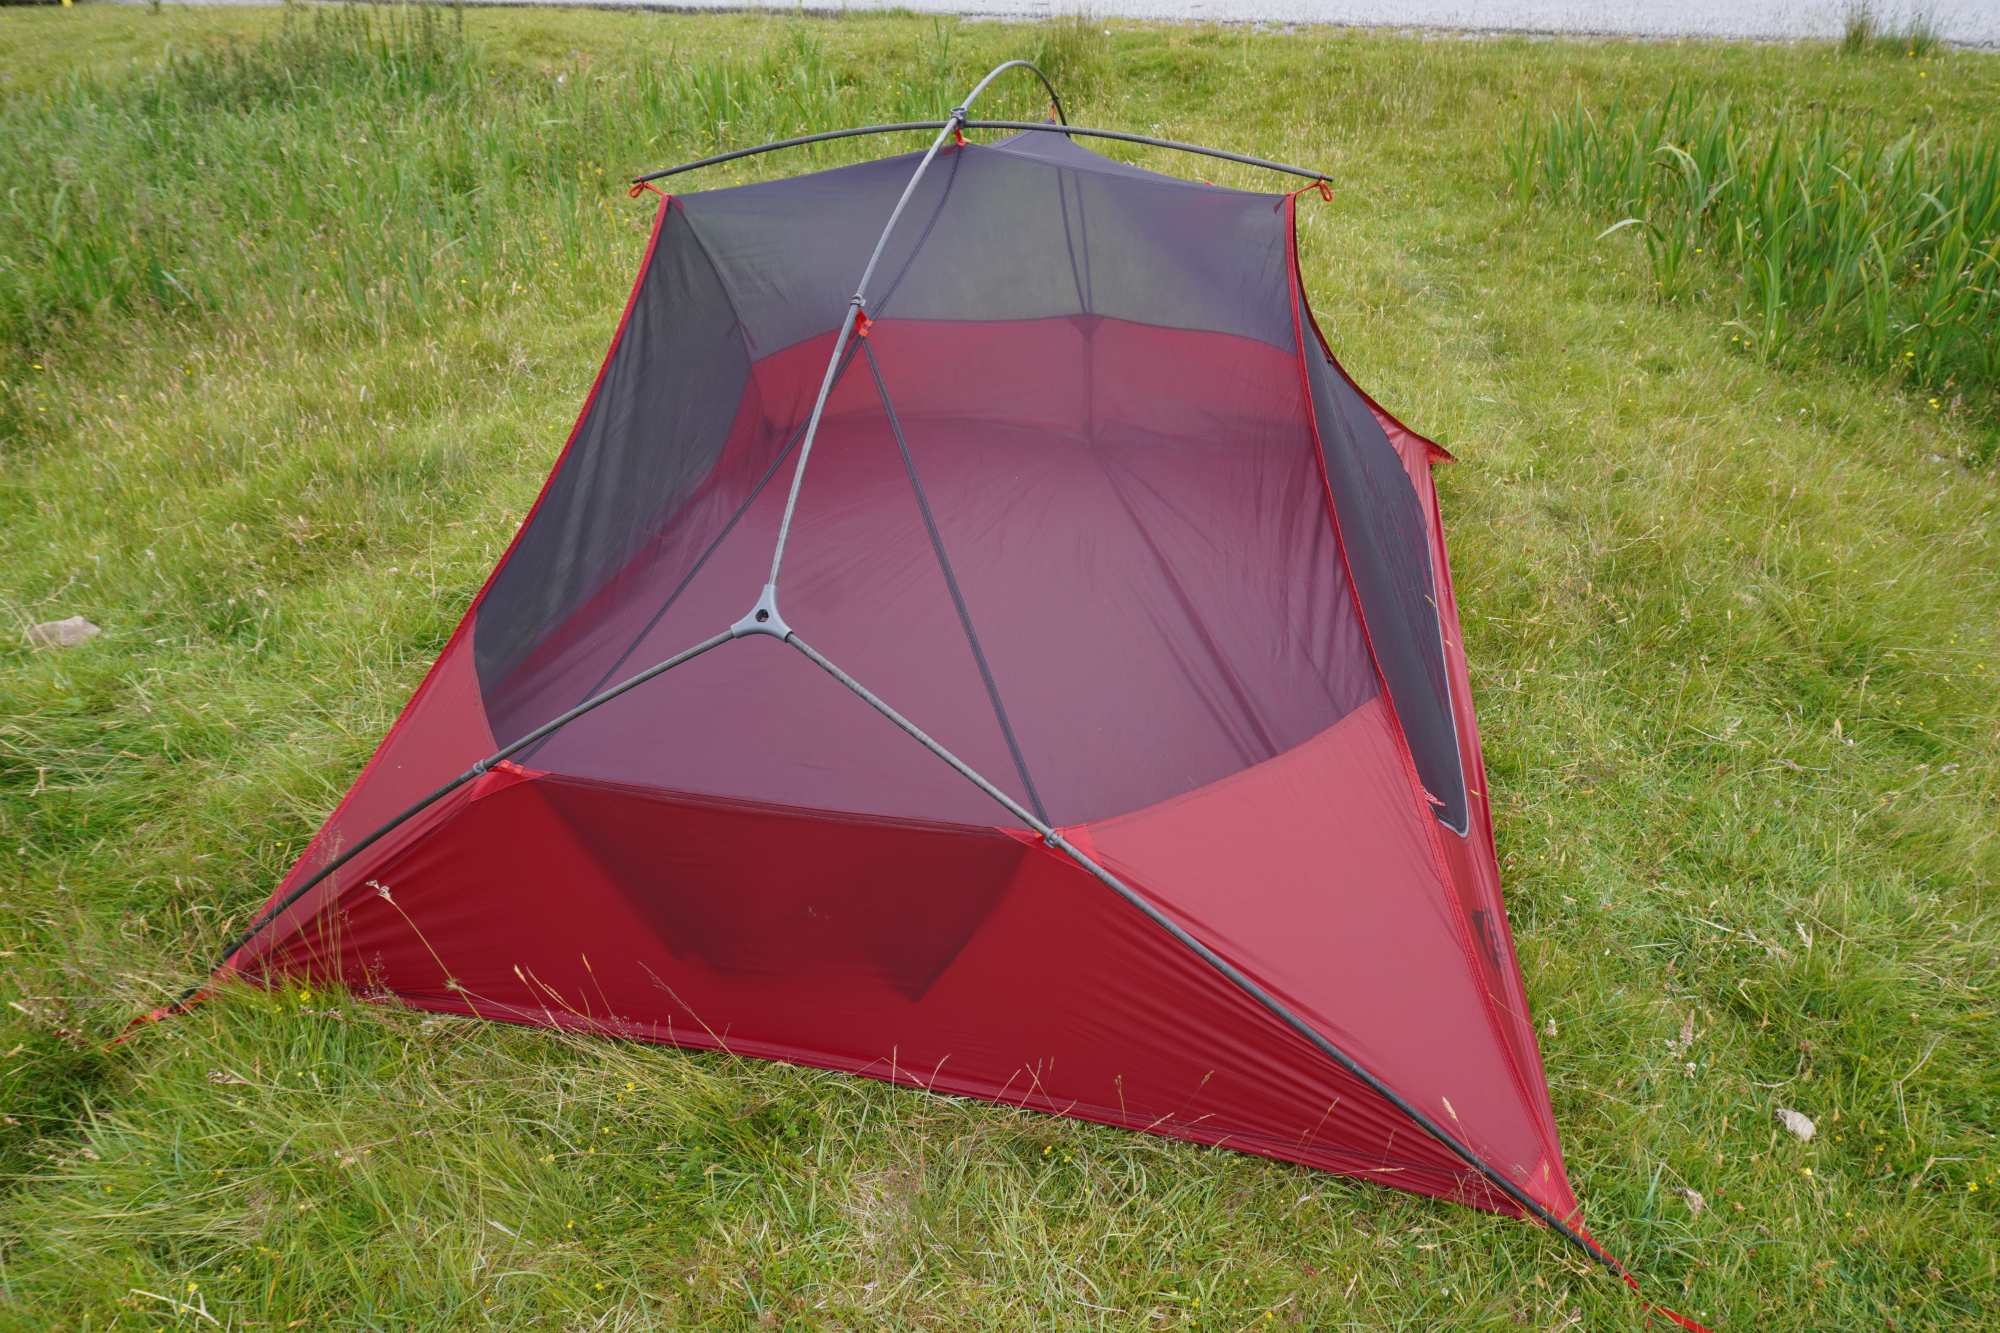
On the opposite side, just a single pole forms a kind of spine and attaches in the middle point between the two other corners. Once the poles are in their metal hooks, you just clip the inner part of the tent to the poles and then connect up the small cross bar at the top which provides you with the headroom.
Then, you’ll need to unfurl the rain cover and, on the side with the fork in the poles, the cover needs to be connected to the tent poles with similar metal hooks. At the other end, the 'spine' end, it’ll need hooking onto the tent pegs. Finally, on the left and right hand side of the tent, the 'doors' to the entrance just need pegging out.
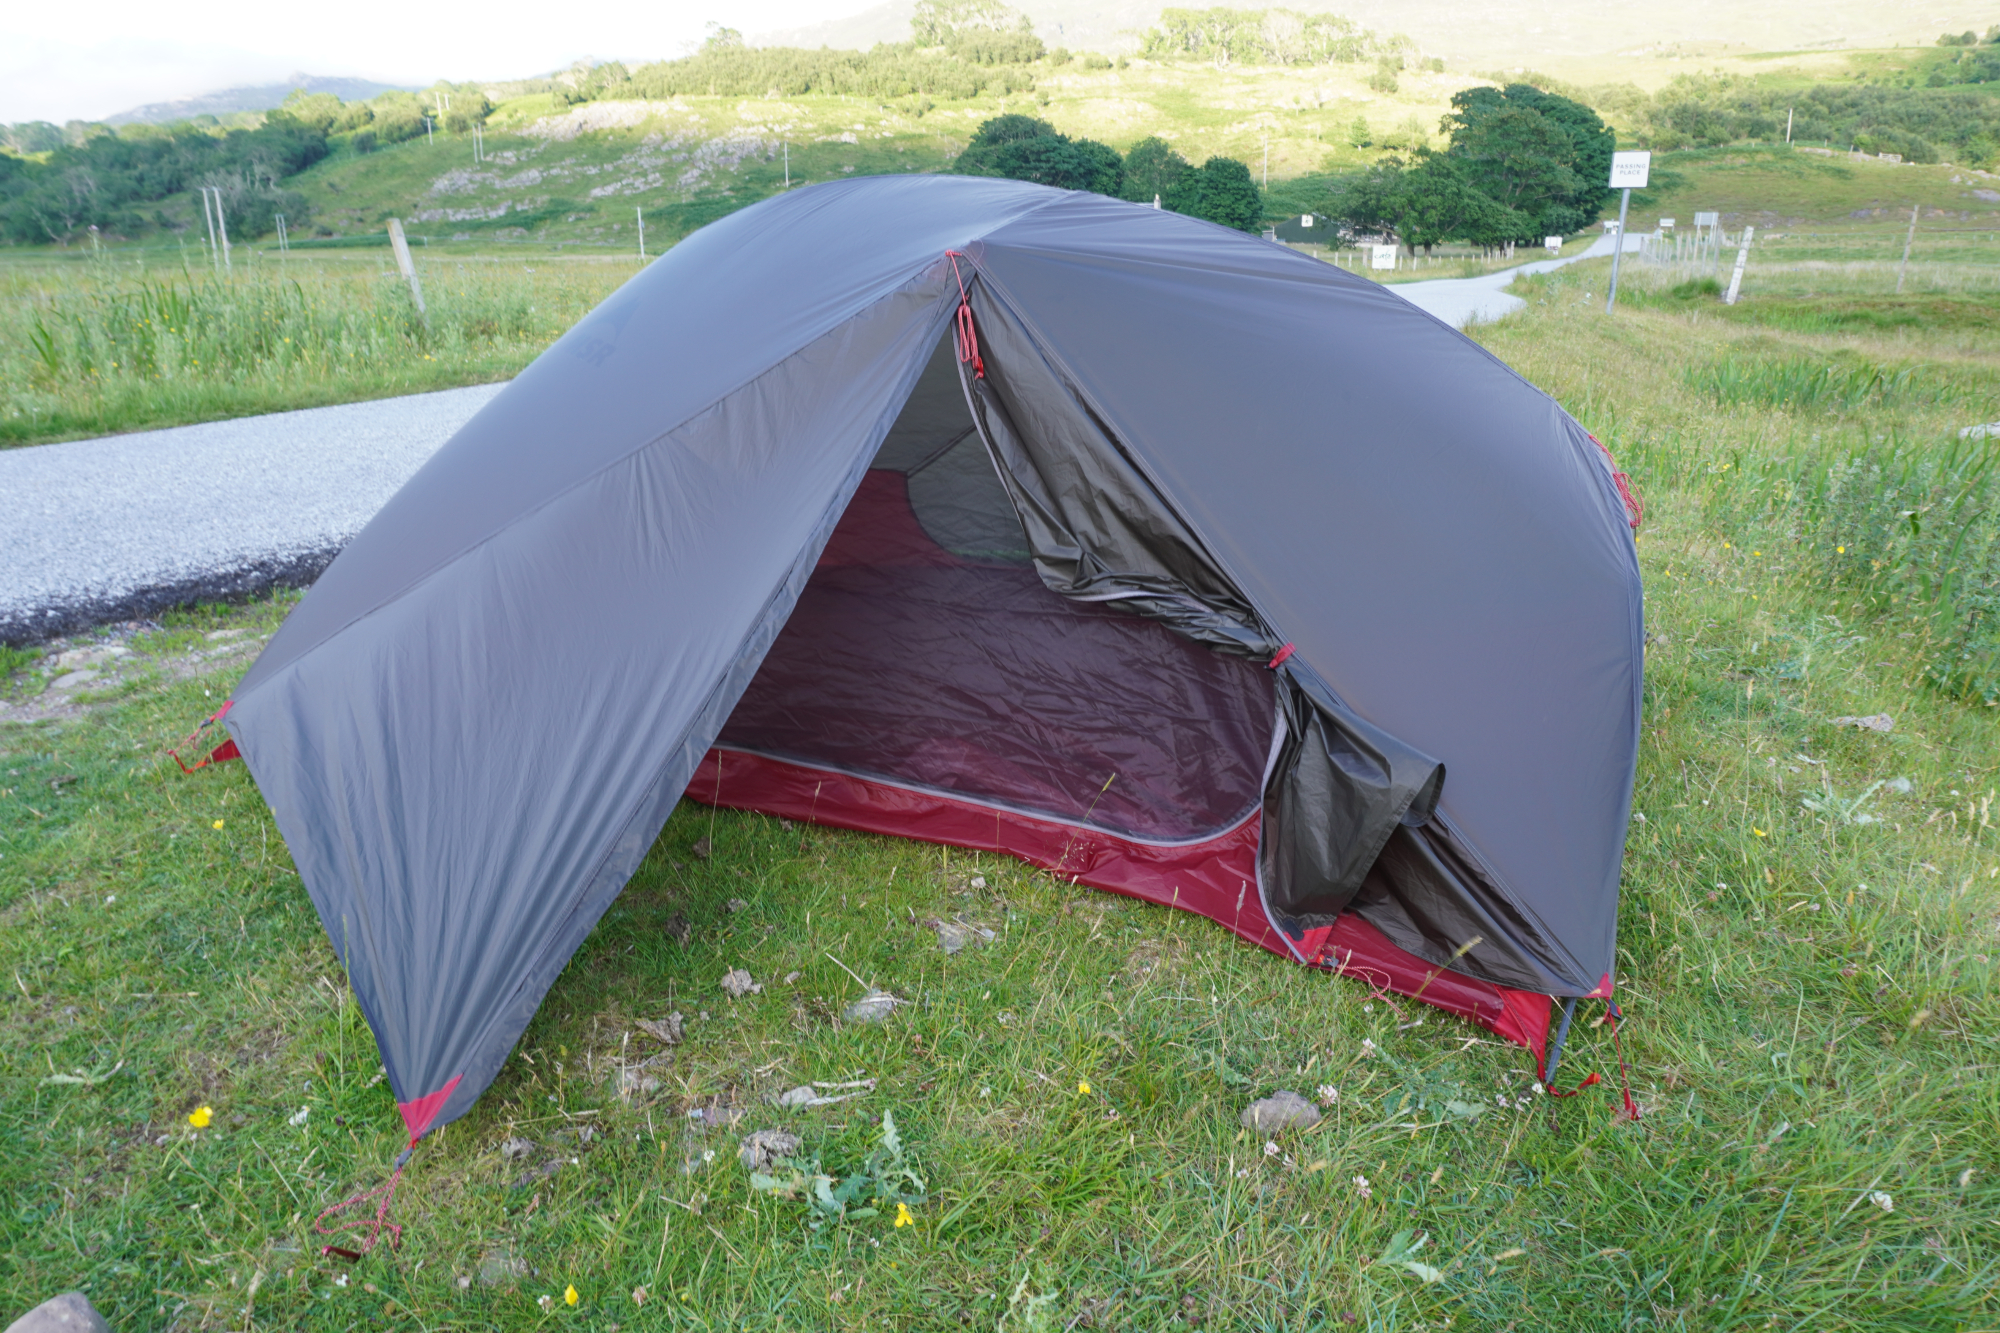
And there you have it. It’s quite quick to put up – a couple of minutes top – but only so long as you’re clear on which end is which. It doesn’t take long to become familiar, though.
One thing it's worth noting, though, is that the inside of the tent will get wet if you put it up in the rain, as the cover goes on last.
The ride
Using the MSR Freelite 3
The MSR Freelite 3 has separate entrances on each side, which is super convenient, and is very spacious for two people. When bedding down, there is loads of room at the sides for stashing layers, food, phone, water bottle, etc. for easy and quick access.
Headroom is reasonable too. Naturally, you can’t stand up straight, but sitting down there was plenty of space above my head that it didn’t feel claustrophobic at all. Although I am 177cm – which isn’t particularly tall – I have proportionately quite short legs and quite a long torso, so if you are a bit taller, your experience should be very similar.
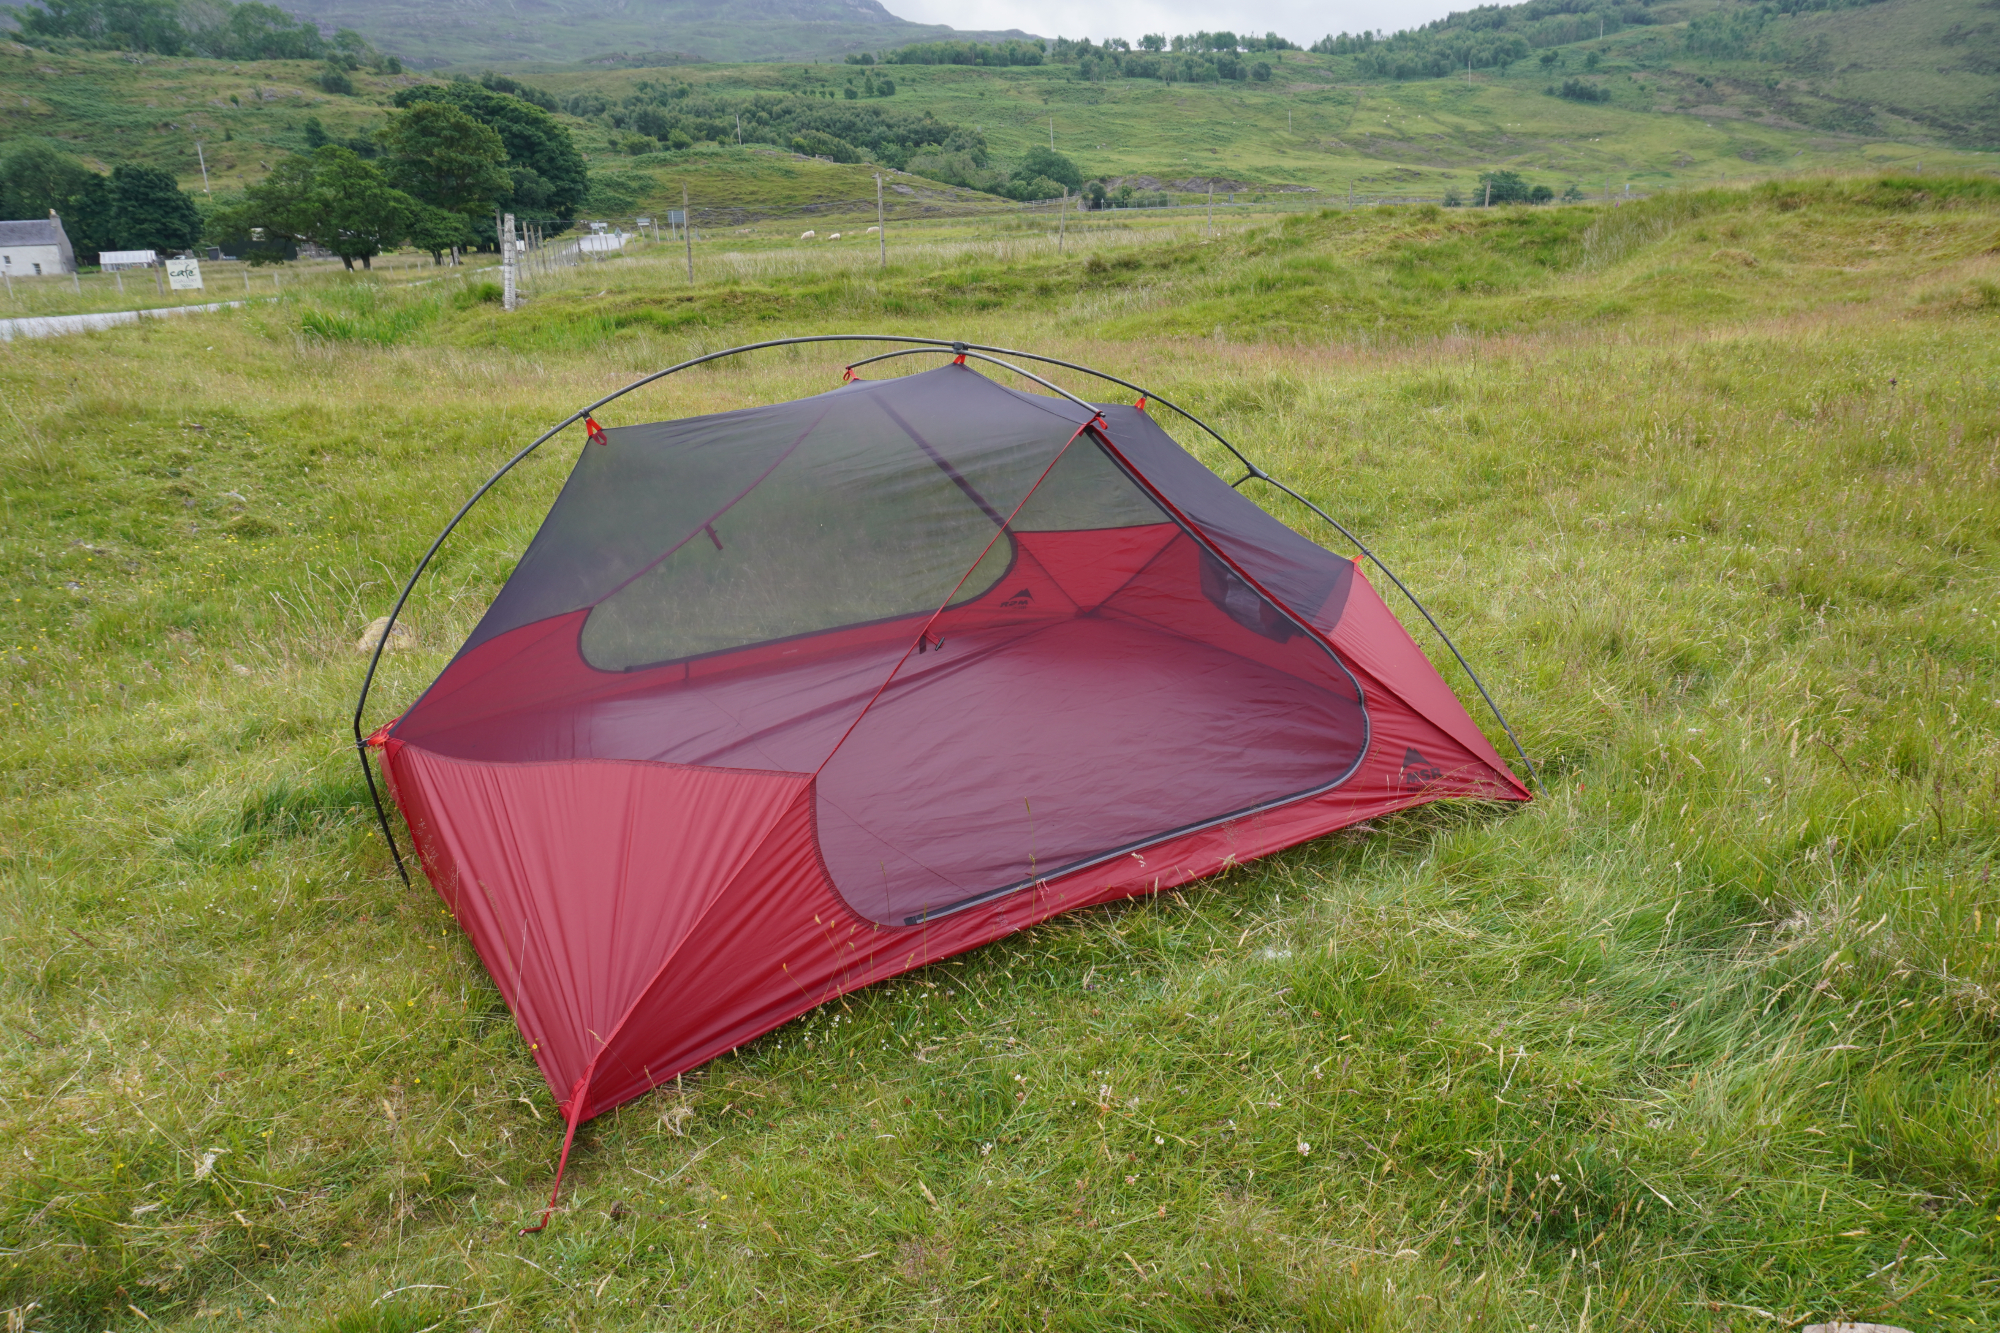
The area underneath the rain cover doors is quite generous (more so than the pictures convey), providing ample space for keeping bags and shoes nicely sheltered.
There is one caveat, which is that it’s quite low profile – you’d have to be very small or very bendy if you wanted to exit the tent, zip it back up, put your shoes and jacket on and then open up the rain cover to embrace the elements and insects.
I could just about do it in a pinch, but generally I would have to open inner part of the tent and then the rain cover before then getting out – unfortunately giving insects more of a chance to get in.

For three people, the space is a little tight, you can’t have layers, water bottle and phones placed conveniently next to you – the mats are pretty much shoulder to shoulder. But the tent is quite long and there’s plenty of space for storing those things by your feet at the end.
To be clear, this is space in excess of the sleeping mats – so, providing you don’t require a mat longer than 191cm, you should find the same.
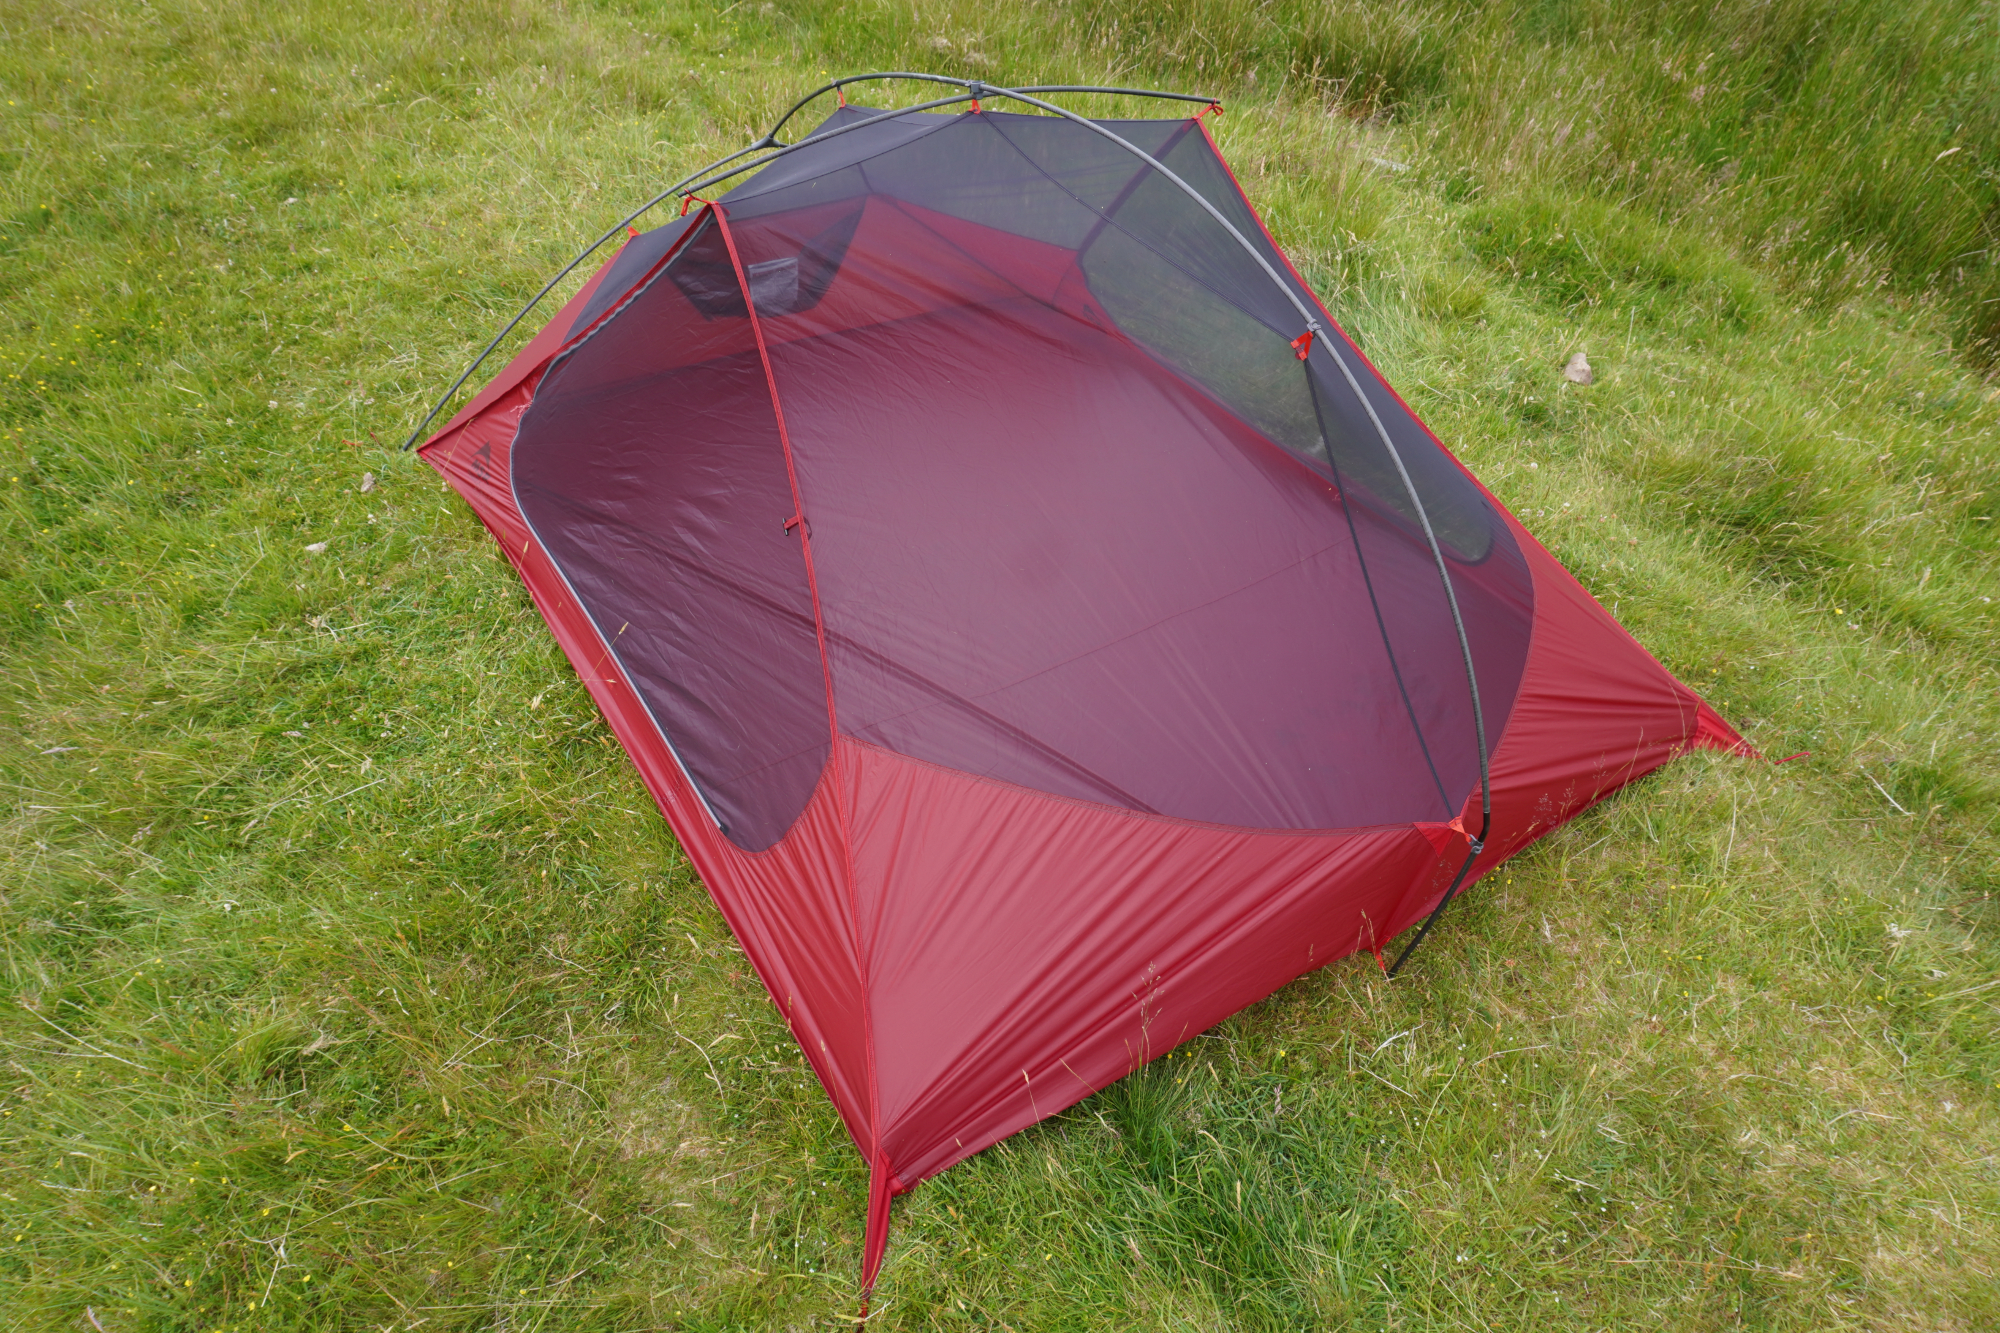
The stability of the tent in high winds was incredibly impressive. To give some context, although I’ve spent quite a bit of time in Scotland over the years, I’d never been to the Western Highlands in the peak of summer before. I thought I had a pretty clear handle on just what to expect from the midges, but my God was I caught by surprise – there were literal clouds of them.
Fortunately, midges can’t hack it in high winds, so after one particularly bad experience on the Isle of Skye, I started pitching the tent in as exposed locations as I could find. Camping in a new spot every night and being quite lazy, for the most part I never used the guy ropes. But even then, it stood remarkably firm.
There was only one time I actually needed to use them, and that was on the bank of Gladhouse Reservoir in the Scottish Borders. The forecast said the wind speed was over 60kph, with gusts in the 70s – and you could certainly tell from inside the tent.
To be fair, if the tent was pitched with the pole fork facing the wind – rather than having the door be face on – I think it may not have needed the guy ropes even then. Although I wasn’t about to head out and repitch the tent to confirm my suspicions.
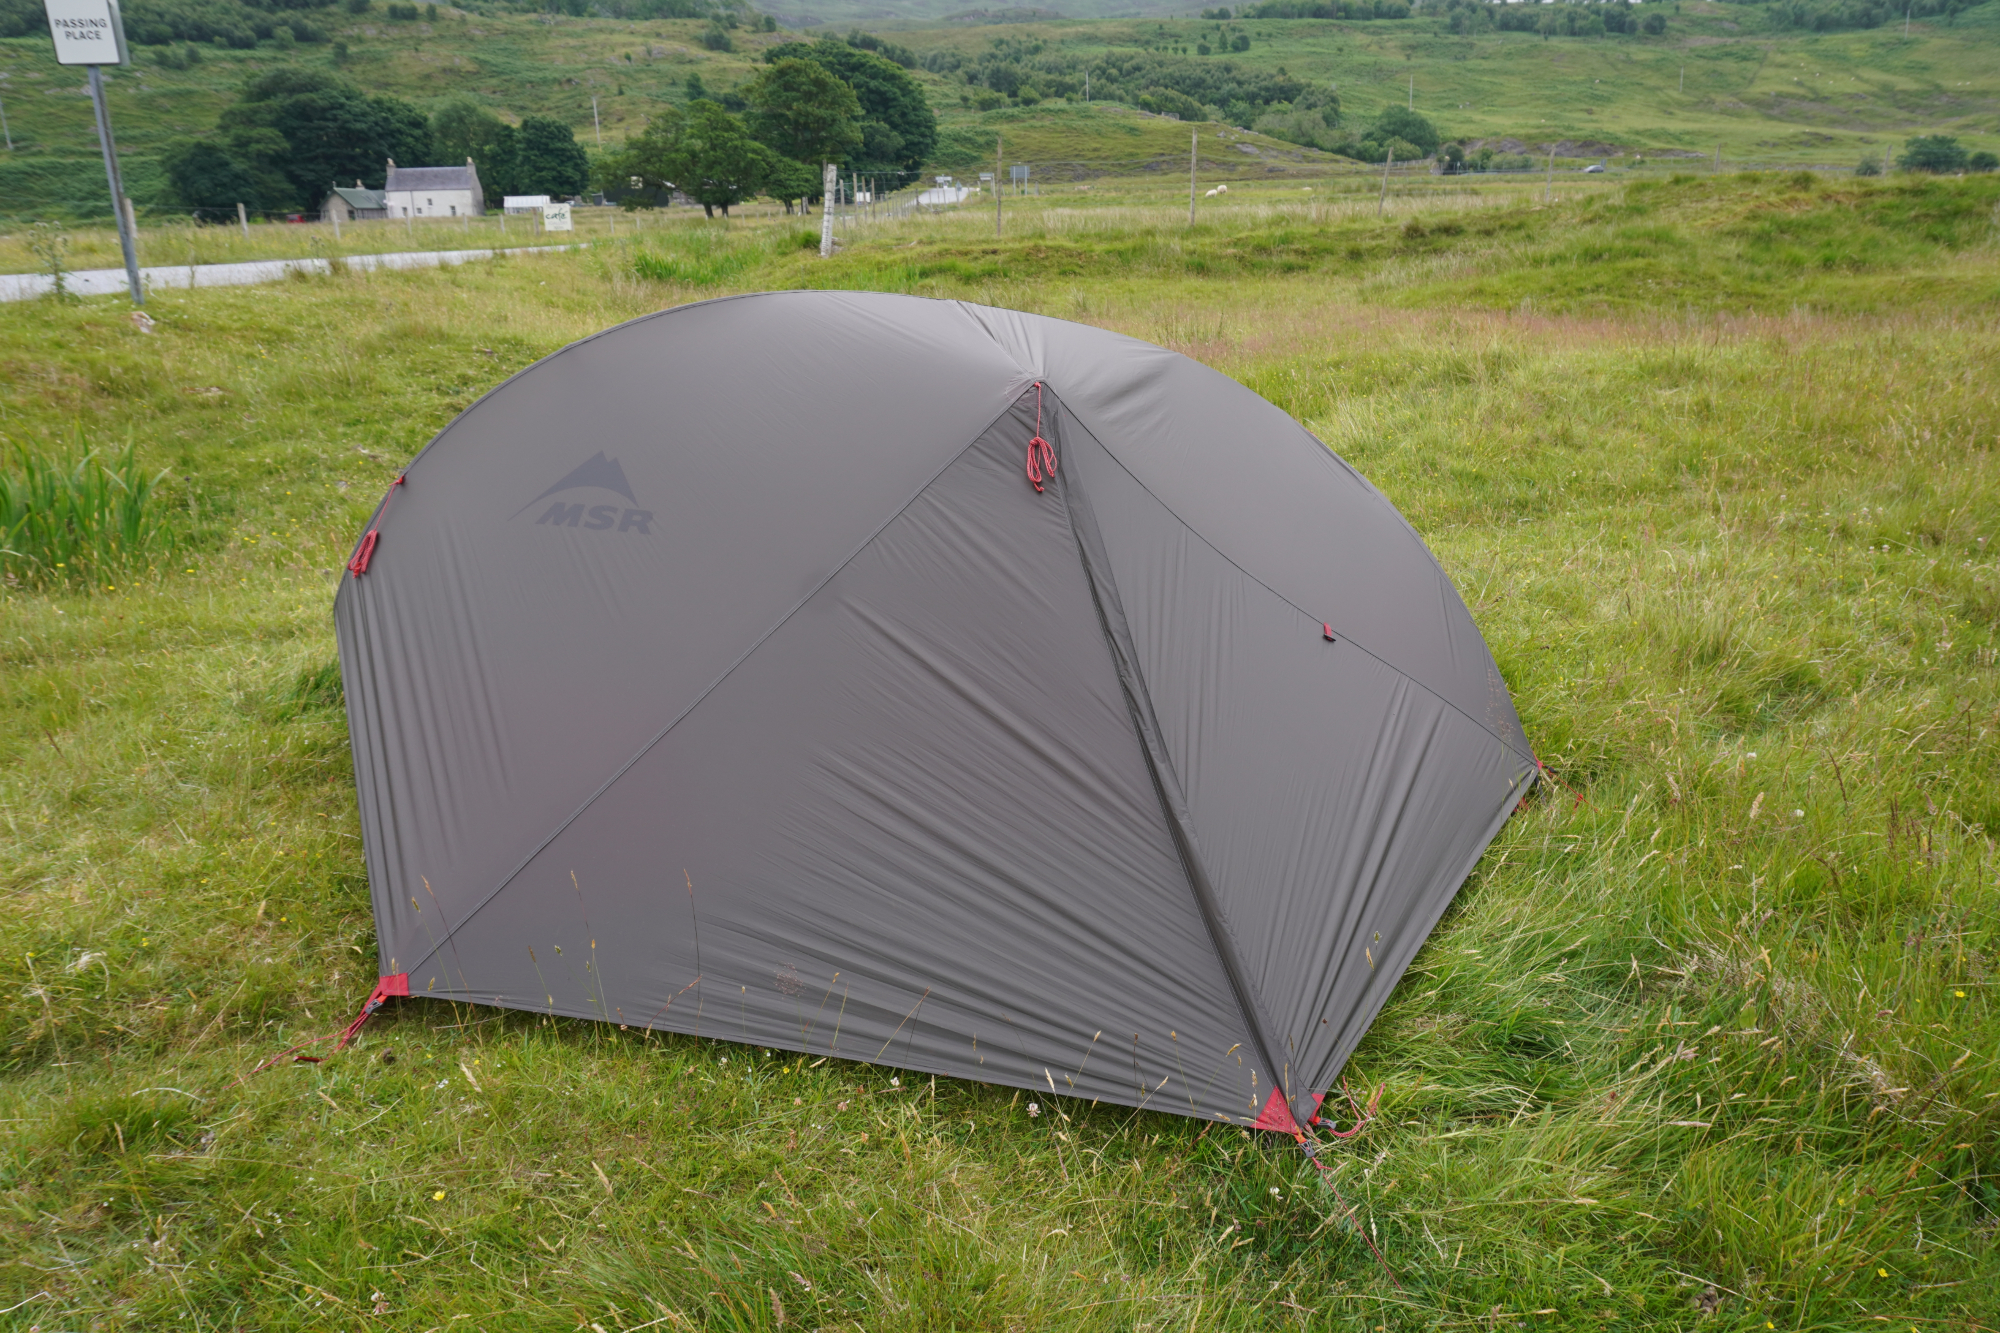
The material does feel quite thin and delicate, so for longevity’s sake it is probably worth using a ground sheet in conjunction, although this would add to the weight and bulk. Perhaps the compromise is to use one when travelling as a three, as there’s more people to spread the load over.
Transporting the tent
The stuff sack is excellent. I’m sure we’ve all had the frustration of a tent bag which will only just fit the tent in – and even then, only when rolled in a very particular way. This is quite the opposite. I could be quite haphazard when rolling up the tent and it would always fit easily in without any protestations.
You really should still make sure to roll it, though. I tried just stuffing it in like you might a sleeping bag, but that ended up taking up more time trying to get it all contained than it would taken to just give it a rough rollup in the first place.
But for all the ease of packing away, it’s still very low bulk, with the combination of a drawcord and compression straps.
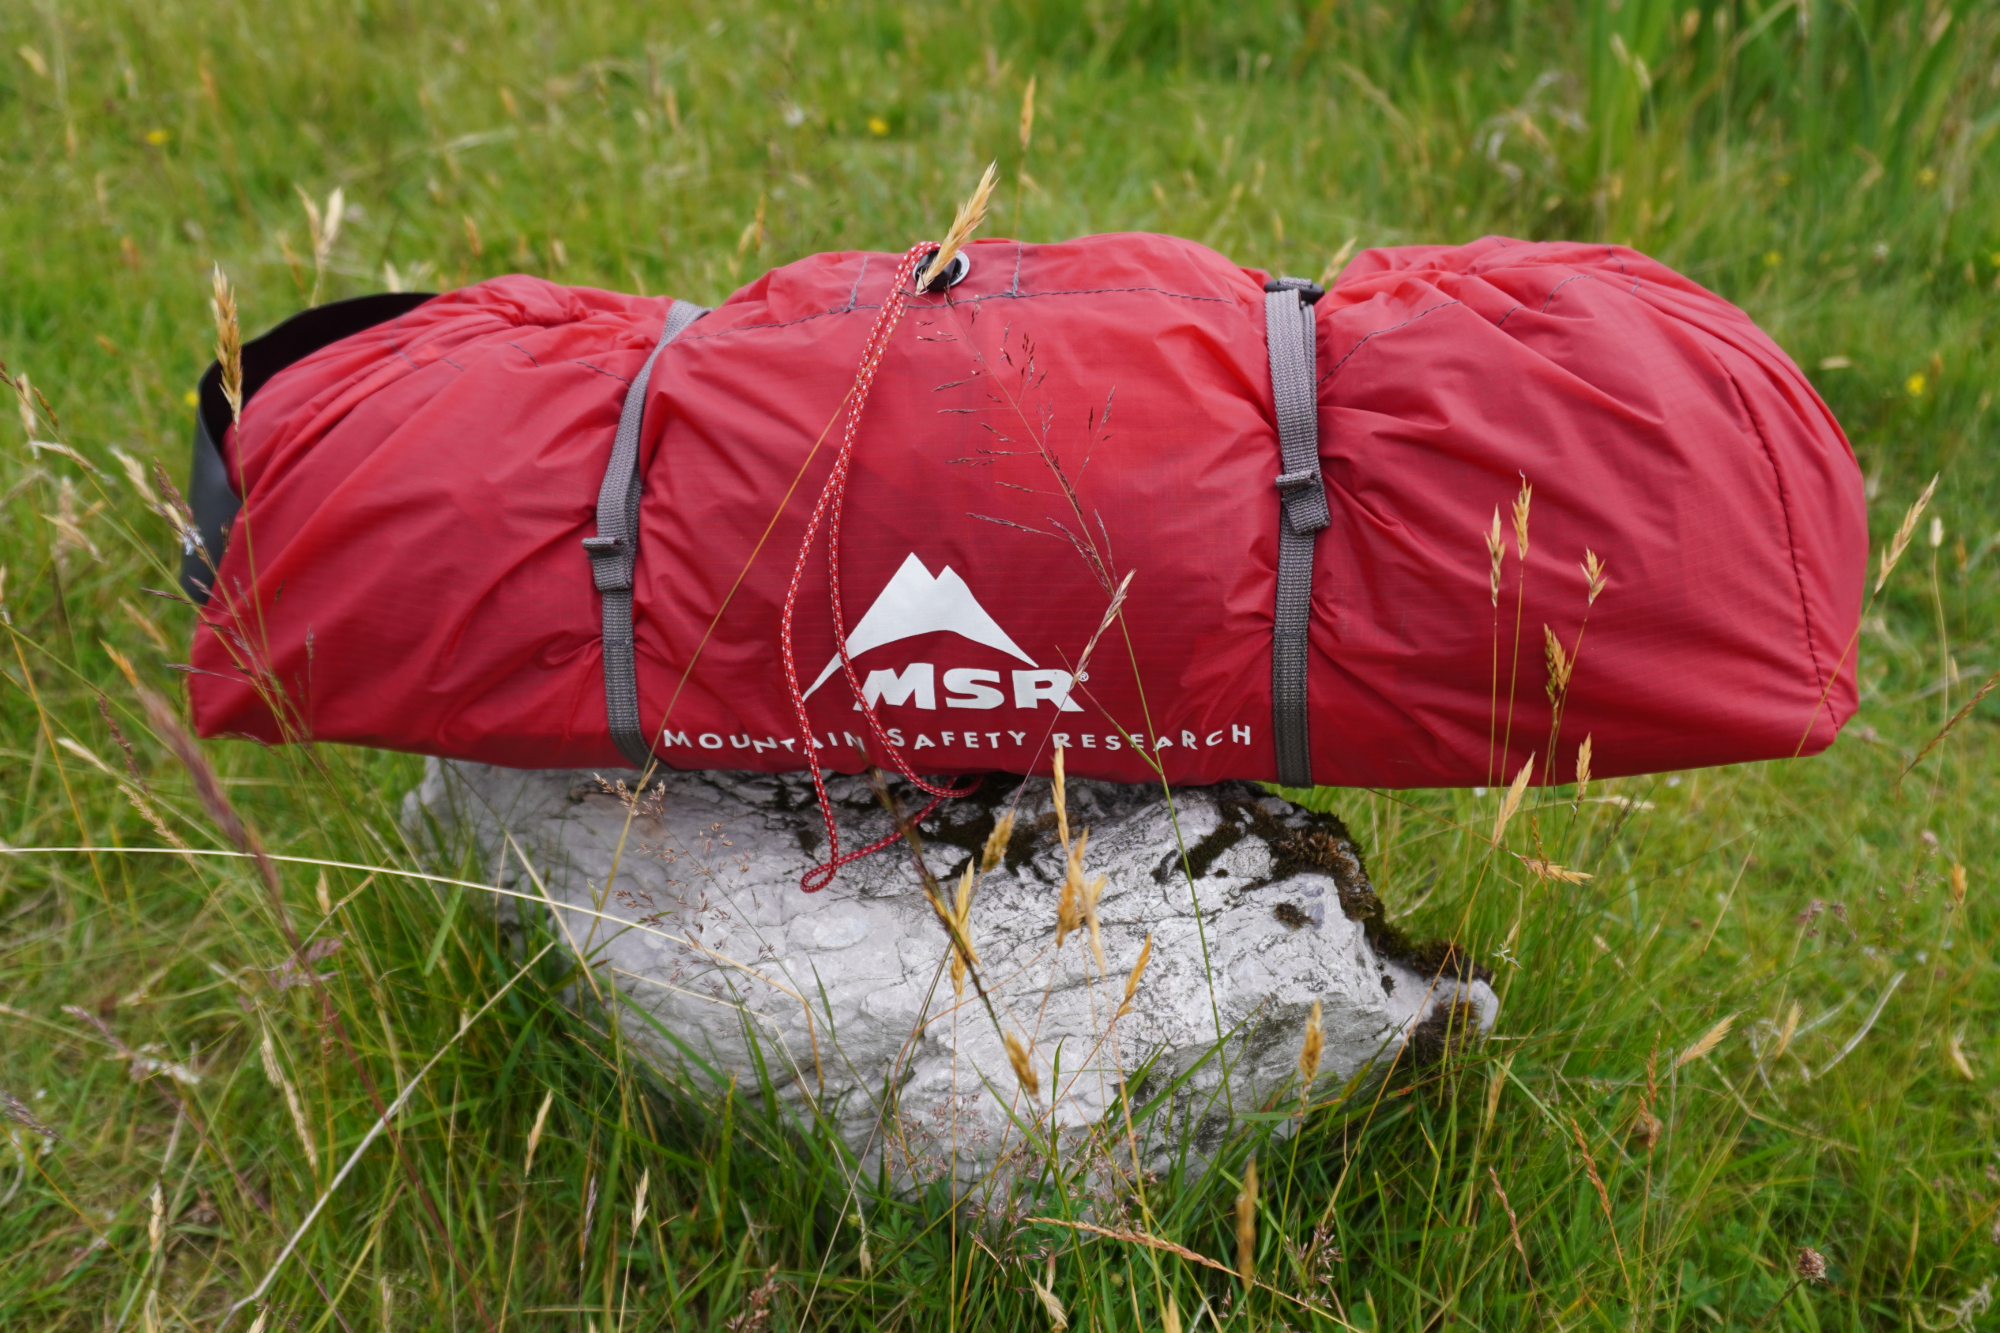
Like this, you can easily fit it inside a pannier bag, or if you want to keep things more streamlined, you could just put it on the top of a pannier rack.
Or, if you’d rather break all ties with pannier racks, or perhaps your frame can’t easily fit one, it is perfectly possible to fit this tent into a frame bag, such as the Topeak Midloader 6L.
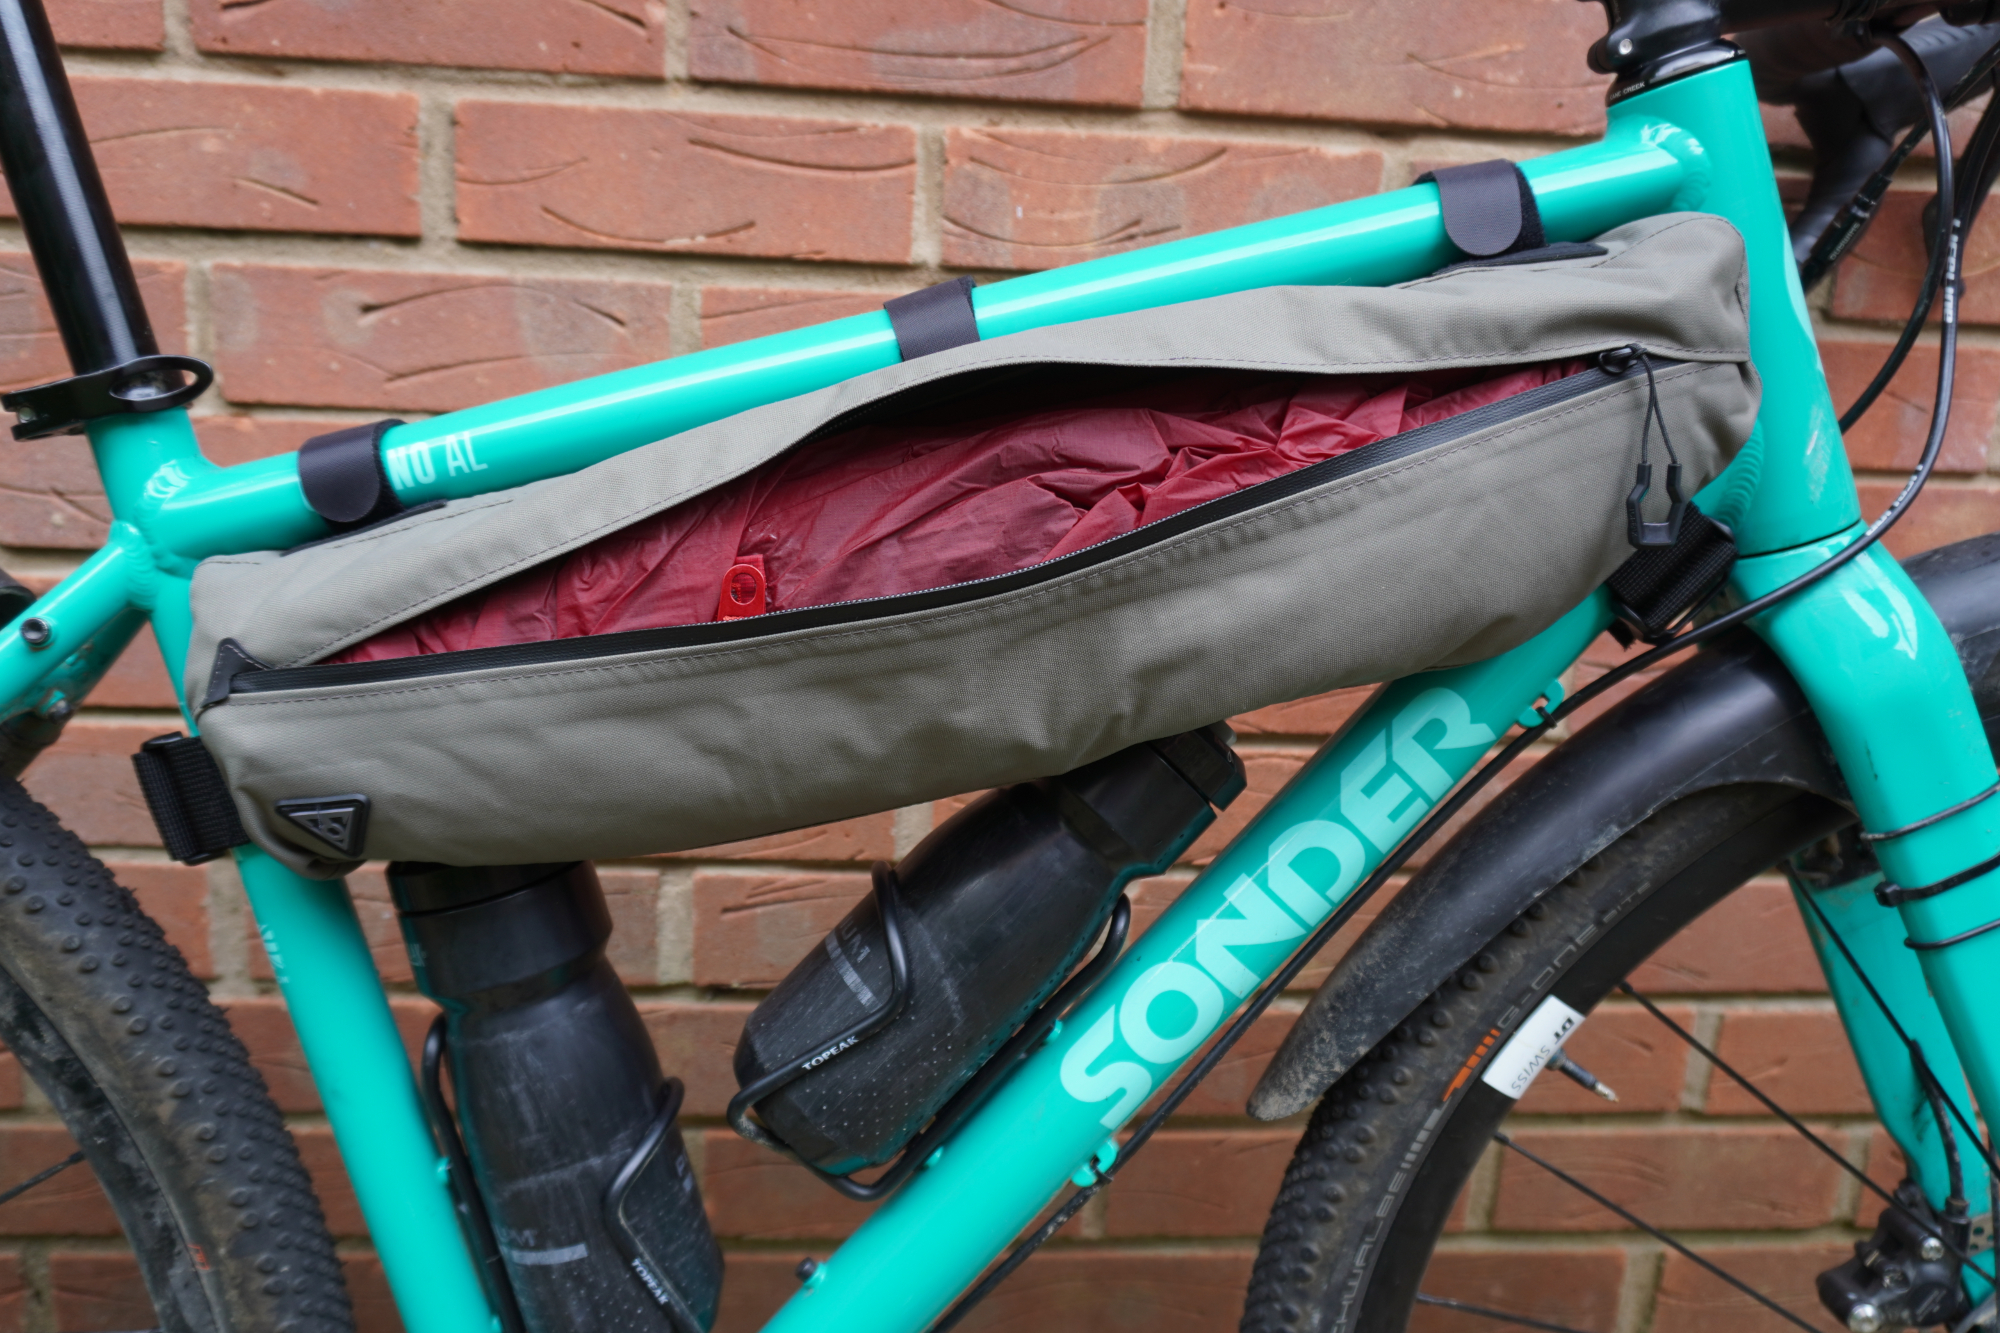
There are a few caveats to this. First, you have to have enough space inside the main triangle of your bike – a minimum of 51.5cm – otherwise the poles won’t fit. Also, the frame bag really does have to be at least 6L, and even then, packing it in is a bit of a challenge.
The bottle on the down tube I can squeeze in and out without too much trouble, although that is with an alloy cage. If yours is plastic or carbon and isn’t a side-loading design, you may need a different cage. The bottle on the seatpost I do need two hands to extract, but this isn't an issue for me bikepacking, as stopping to swap them over isn't exactly an imposition.
Finally, although the whole tent can fit in, it does puff out the frame bag quite a bit. If you like a narrow Q-factor and don’t like rubbing on your knees, you’re not going to be so happy with this setup.
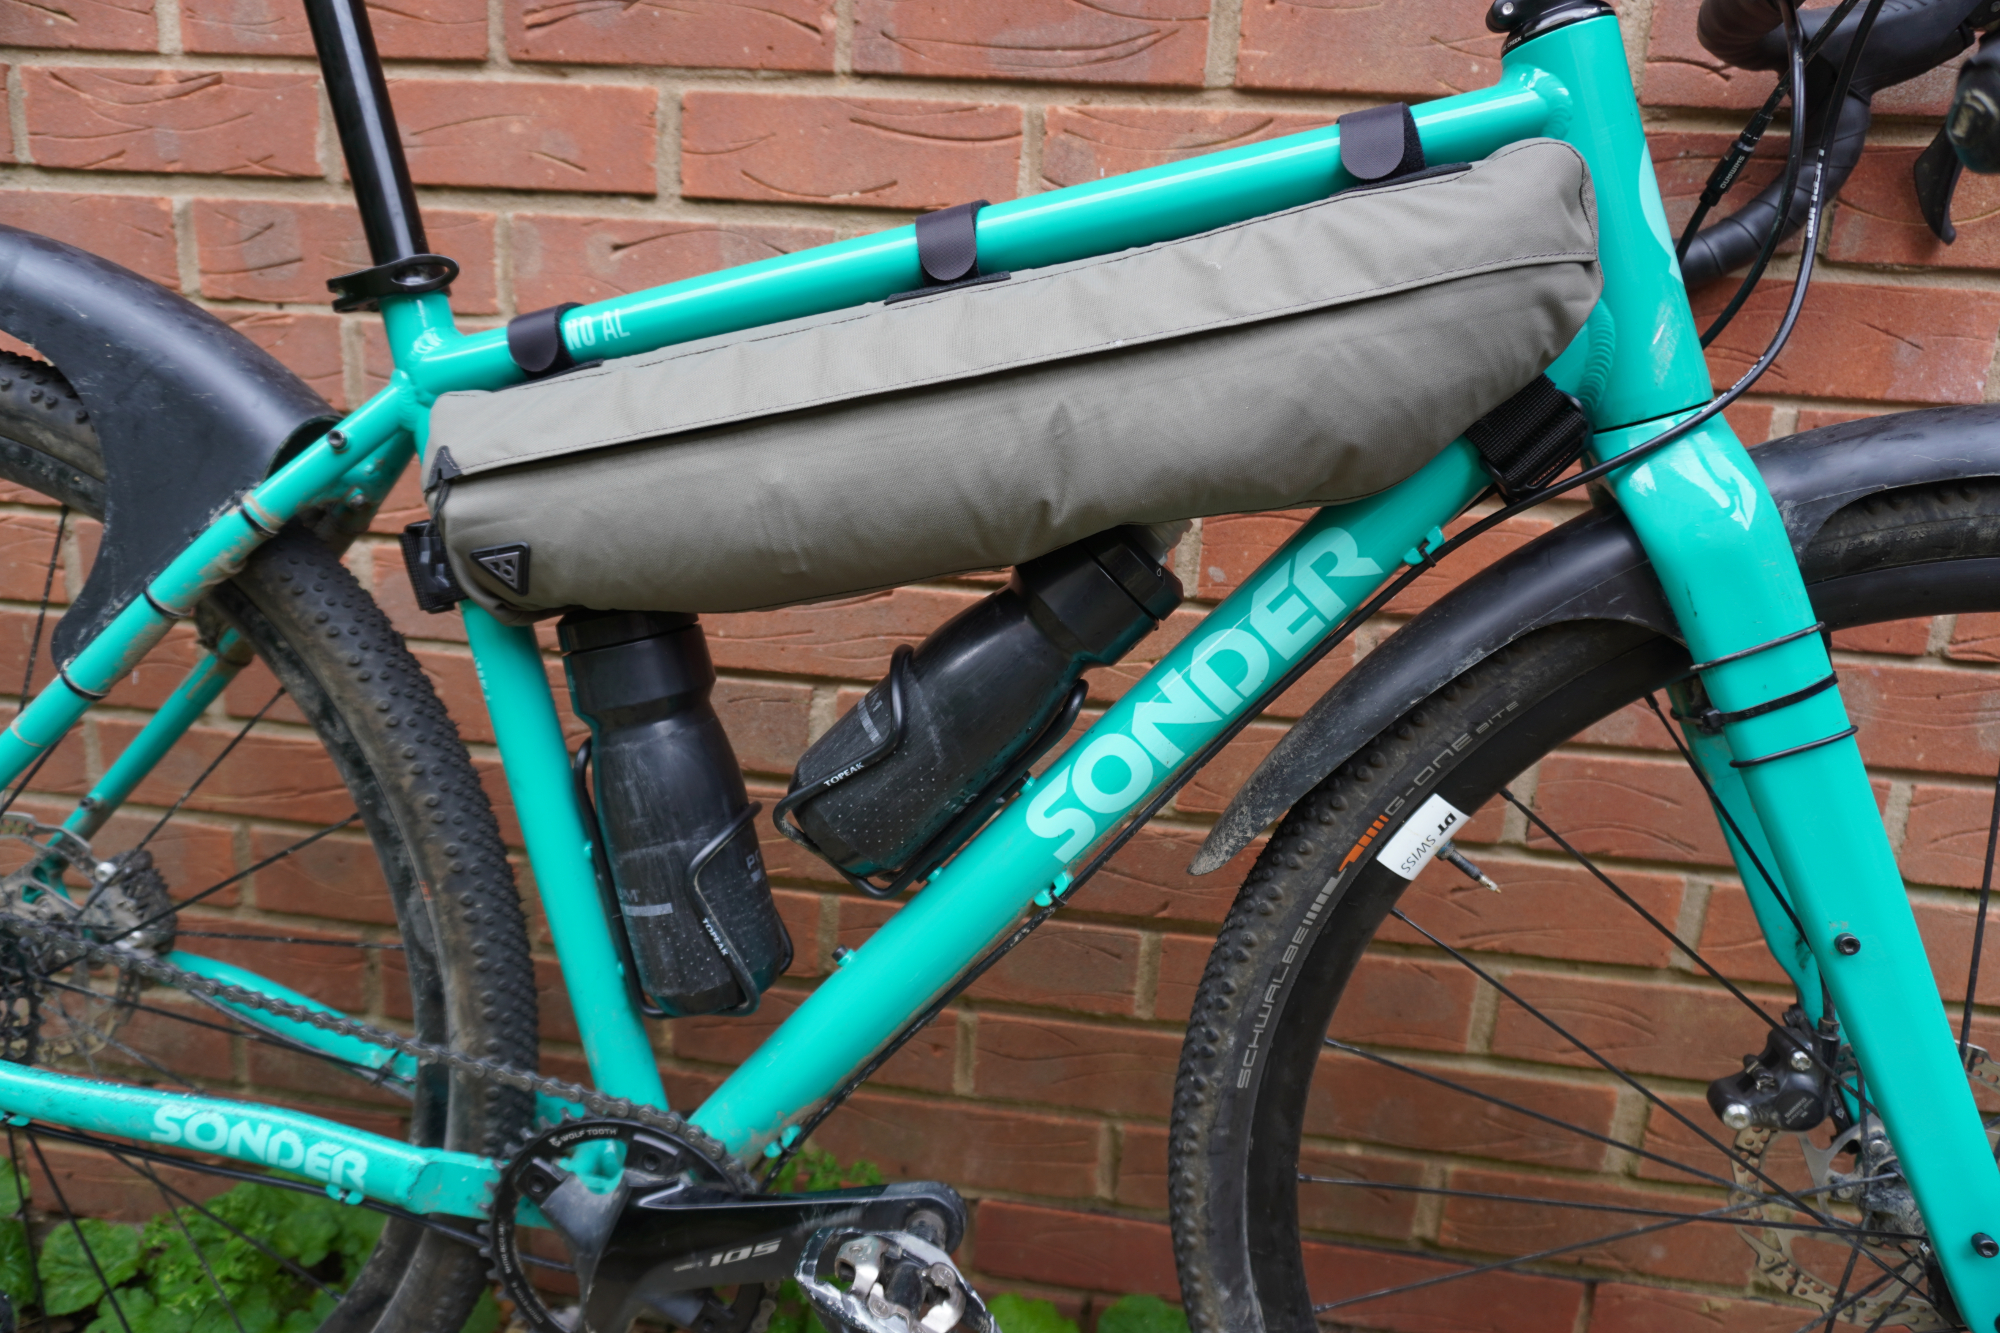
But there is a happy solution: store the rain cover somewhere else – preferably on someone else’s bike. With just the poles, pegs and inner part of the tent, it’s quite easy to pack the frame bag and it’s much less bulky.
I’m pretty fussy about knee rubbing myself, so my first port of call would always be some form of rack. But even so, this setup with the frame bag was enough to keep me content.
Of course, this is just one example with one particular 54cm-framed bike. There will be 54cm bikes where this setup isn’t possible – and it is very unlikely that you’ll be able to fit the tent in like this on a smaller bike.
Then again, on a larger bike, you’ll likely be able to run this setup with even a little more ease than I’m able to – you may even have immediate access to both your bottles (such luxury!).
But my setup does at least provide one data point, which will hopefully make it a little easier to gauge whether your own setup is likely to work.
Value
At £549.99, the MSR Freelite 3 does represent a considerable investment. But that said, it doesn’t take too many nights using B&Bs to add up to a similar amount – especially when travelling as a trio – and after that, you can then think of it as essentially free accommodation.
There are cheaper alternatives, such as Alpkit’s Ordos 3 which costs just £199.99. It is a little heavier with a claimed weight of 1.94kg, compared to the Freelite 3’s 1.34kg. The listed packsize of the Ordos 3 equates to about 7.6L – although you could maybe pack it more tightly, it will likely be more of a struggle to fit in a half-frame bag
At the other end of the scale, Big Agnes’ Tiger Wall 3 Carbon with Dyneema Tent costs £999.99 and has a claimed weight of 0.94kg. Unlike the Ordos 3, it does have dual-sided entry. The width of the tent is listed as "152cm to 168cm", compared with 172cm for the MSR Freelite 3. So, it will likely be a little more of a snug fit for three.
Verdict
The MSR Freelite 3 is an excellent tent for bikepacking. It’s lightweight and low bulk – but doesn’t take this so far as to completely sacrifice other qualities, such as durability and price. It’s got a good packsize, both in its handy original bag with compression straps and in a 6L half-frame bag. In green, it makes for a discreet tent with plenty of space for two and fitting three without a struggle.

Thank you for reading 20 articles this month* Join now for unlimited access
Enjoy your first month for just £1 / $1 / €1
*Read 5 free articles per month without a subscription

Join now for unlimited access
Try first month for just £1 / $1 / €1
Get The Leadout Newsletter
The latest race content, interviews, features, reviews and expert buying guides, direct to your inbox!

After winning the 2019 National Single-Speed Cross-Country Mountain Biking Championships and claiming the plushie unicorn (true story), Stefan swapped the flat-bars for drop-bars and has never looked back.
Since then, he’s earnt his 2ⁿᵈ cat racing licence in his first season racing as a third, completed the South Downs Double in under 20 hours and Everested in under 12.
But his favourite rides are multiday bikepacking trips, with all the huge amount of cycling tech and long days spent exploring new roads and trails - as well as histories and cultures. Most recently, he’s spent two weeks riding from Budapest into the mountains of Slovakia.
Height: 177cm
Weight: 67–69kg
-
 What does Q36.5 mean? We asked the people behind the Italian kit brand that sponsors Tom Pidcock's team
Q36.5's Luigi Bergamo and Lodovico Pignatti Morano take on Cycling Weekly's Q&A
By Tom Thewlis Published
-
 'If I were a tennis player then my career would be over': Remco Evenepoel contemplated early retirement after serious training accident
Double Olympic champion was left with nerve damage and says his shoulder is not yet fully healed ahead of his return to racing at Brabantse Pijl
By Tom Thewlis Published
-
 'It can really push me along' - How a velodrome comeback is making Caleb Ewan faster on the road
Australian says he'll "definitely" continue track work after rekindling passion
By Tom Davidson Published