How to set your handlebar height
Getting your handlebar height right makes all the difference to your ride comfort and aerodynamics
This article has been freshly updated as part of our 'New to Riding' week, running from March 10 to March 17, with a special focus on tips, tricks and inspiration for new riders.
It’s likely you’ll need to make a few adjustments on a new bike so that it fits you well. Being one of three contact points, the height of your handlebars can make a big difference to comfort, how the bike feels to ride and, consequently, how confident you are. You can have a professional bike fit or you can make some adjustments yourself with a DIY bike fit.
As a beginner cyclist, you’re likely to feel that a higher, more upright position is more comfortable — because it generally is! But if you want a racier, more aerodynamic position then you should lower your bars.
The good news is that changing handlebar height is a simple job, so if something doesn’t feel quite right, make small adjustments up or down to work out what's best for you. Bike geometry also plays a big part; if you're riding a more aggressive road bike model, you may not need to lower your bars at all, or may need to raise them, whereas if you have an endurance road bike it will have a taller head tube and a more upright position to start with.
Read our step-by-step guide and watch our video to become an expert at adjusting your handlebar height.
How to set your handlebar height in five easy steps
Setting your handlebar height correctly is often overlooked but is an important step in creating your perfect ride, whether you're hunting aerodynamic gains or want more comfort.
Before making a start, you should account for things like your bike's geometry: a bike with a short head tube will naturally place the handlebars in a lower position, and vice versa. So just because you had all the spacers removed on one bike, it doesn't mean the same applies to another.
The latest race content, interviews, features, reviews and expert buying guides, direct to your inbox!
Signs your handlebars are too low include numb hands and soreness in the lower back. If you're making adjustments as a result of discomfort, the amount of pain you're suffering from should also be understood. If you're suffering a little soreness from a curved back this article should help you, but if you're in pure agony when riding we suggest seeing a professional bike fitter.
Step one - Have an idea of what you want

Use all the spacers to set your handlebar height higher
Getting that perfect fit can be determined by a few different things. Firstly, what do you want to get out of your riding? Are you a long distance rider who values comfort or a racer who wants to shave seconds off your personal best?
Generally, if you're after comfort, you'll want a slightly higher position, if it's aerodynamics and speed, you'll want to be lower. But bear in mind if you go too low for your level of core strength and flexibility, you'll throw off your balance, producing less power and thus going slower.
Step two - Measure your comfort zone
If you're looking for a more comfortable position for those longer rides you may entertain the idea of a more upright position, so higher handlebars would be a good solution. Alternatively if you're racing, you'll want to drop the handlebar height to a point where you're low enough but not in discomfort. A good way of doing this would be to get a bike fit where they can measure your body to the outcome you want.
Unless you're very serious about getting that perfect height, bike fits can be a bit expensive so don't worry. A simple case of listening to your body when running a few different heights will give you a good indication as to what is a good height for you.
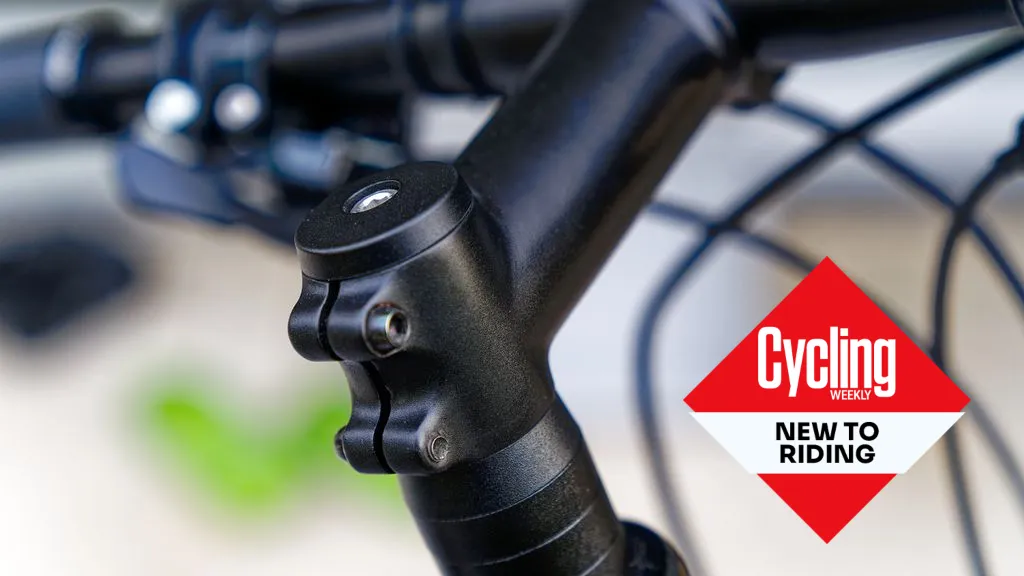
Step three - Loosen your stem cap and screws

Loosen the top cap and screws to adjust your handlebar height
Now that you know what height you want it's simply a case of rearranging your existing set up. First you'll want to unscrew your stem cap bolt, usually a 4mm or 5mm hex bolt that's situated in the centre of your stem cap. You'll need a multitool or Allen key for this. Once this is removed you can undo the bolts securing your stem to the steerer. They're usually 4mm hex bolts, but you'll sometimes find other sizes or Torx bolts.
Step four - Remove your stem and adjust any spacers accordingly
Now that your stem is loosened, you can lower it or make it higher using your spacers. If you want a more aero position you may find yourself removing all the spacers and placing them on top of your stem giving you a lower position. The opposite will be true if you want a more upright posture, seeing more spacers being placed under the stem to give it a higher position.
You need to replace all your spacers back in the stack for the steerer to be safe. If you're confident in your new position you can get the head tube cut down for a neater look, but it's a one-way street — there's no going back once it's done. You should get this done by a bike shop who will have the right tools to make a parallel cut and will know how much to cut the steerer down.
Step five - Re-tighten the stem cap and screws
Now that you've adjusted your set-up to your needs, you can go ahead and tighten everything back up and be on your way. When doing this, make sure your handlebars align in a straight position so as not to affect your steering.
A final point to note is that when tightening screws, it's best practice to use a torque wrench to get the correct tension, preventing overtightening and failure. When doing so, be sure to tighten each screw to the same torque, giving an even fitting across all your screws. Your stem will usually have a maximum torque figure stamped on it. It's normally quite light, often 5Nm.
For the most part this should help alleviate any past problems but if you find that you are still suffering we recommend a visit to your local bike fitter who will be able to go into more depth with analysis of your riding position.
Handlebar height, handling and fashion

Long and low might be fashionable - but is it right for you?
More than simply choosing between different functions — comfort and handling/aerodynamics — handlebar height has long been discussed in terms of fashion.
Although fewer cyclists have the ‘long and low’ attitude these days, you’ll find some do still like to slam their stem — moving all the spacers from below the handlebars to above them, to get as low as possible. It may be the best choice for some riders, particularly racers, but it’s definitely not right for everyone and there are lots of cyclists out there that still do it purely because it looks fast, with little regard for how they will feel after three hours in the saddle.
As a beginner cyclist, you may be of any age; you may be looking to commute or looking for a new way to stay active in your retirement. Being comfortable when you start cycling means you’re more likely to keep it going, and not give up because you’ve got discomfort in your wrists or neck, for example.
Lower handlebars are, in general, more aerodynamic and look and feel ‘racier’ (and it’s what you’ll see on most professional road cyclists’ bikes), and the lower centre of gravity that a lower front end creates does improve handling and traction. However, take this too far and it can have an inverse effect, as well as potentially make you very uncomfortable.
The reality though is that many cyclists don’t have the flexibility nor the core strength to maintain a slammed or even relatively low position, one in which there’s a big drop between the saddle and bars.
Having higher handlebars will give you a more upright position on the bike and, although handling is generally slightly better with lower bars, the upright position is more natural for the new cyclist so should give you more confidence.
Either way, you want to be comfortable in all hand positions: lever hoods, bar drops and bar tops; there’s no point in lowering your handlebars to find you can't reach the gears and brakes, or lose all confidence on a steep descent. We recommend making small adjustments at a time to discover the best position.

A bike fit will help you to find your optimum position
Handlebar height FAQs
What is the correct height for bicycle handlebars?
There's not really a correct answer to this. It will depend on a number of factors including what kind of riding you plan to do, your flexibility and, to an extent, your experience.
As a general rule, for a reasonably upright and comfortable position, work out your saddle height, and then aim for the top of your handlebars to be level with the top of your saddle. This is a good place to start, then, if you feel you'd like a more sporty or even aggressive position, you can lower the handlebars slightly.
More competitive riders and road racers are likely to have their handlebars up to 8cm lower than the top of the saddle.
Remember, it's very personal and, as a beginner, you might prefer the confidence higher bars bring.
What is the drop and reach on handlebars?
Handlebar drop is the distance from the highest point on the bar (the flat section on the top) to the lowest point (where the bar curves round and ends). A shallow drop will bring hood and drops hand positions closer together, whereas a deep drop means there will be a more dramatic difference in your body position between being on the hoods and in the drops, the latter being preferred by cyclists wanting a more aggressive position.
Handlebar reach is how far your hands have to reach to be on the handlebars and actually determines how far it is to your shifters and brakes. It's measured as the horizontal distance between the centre of the stem clamp to the furthest away point on the handlebars, which is on the drop area.
In bike geometry, reach is one of the two main measurements, along with stack, that help a rider choose the correct frame size. Choosing a handlebar with a longer or shorter reach will adjust your bike's overall reach measurements, as will selecting a longer or shorter stem.
How to perfectly align handlebars
Getting your handlebars completely straight can be a little tricky. Some cyclists will notice if they are the tiniest bit out, others will have more tolerance for imperfections. You can ensure your handlebars are central on the stem clamp using the handy markers, but getting them straight is usually done by eye.
The simplest way is to stand over the top tube, grip the front wheel between your legs so it's dead straight, and then try to align the stem with the front tyre. You want to have your stem bolts undone slightly for this — not enough for easy movement, but just enough so a tap on the side of one shifter or the other will just knock the stem slightly. You can do this until you're comfortable with the position, then fully tighten the stem bolts.
Some people use a plumb line attached to the centre of the stem to help them, but doing it by eye keeps things simple and it's pretty effective.

Thank you for reading 20 articles this month* Join now for unlimited access
Enjoy your first month for just £1 / $1 / €1
*Read 5 free articles per month without a subscription
Join now for unlimited access
Try first month for just £1 / $1 / €1
A cyclist for over 10 years, Cat started on the road and track, and now loves riding the trails and racing cyclocross. A freelance writer with many years of experience, when not writing or turning left at Herne Hill Velodrome, she likes to spend her time in the mountains, preferably on a bike or snowboard.
You must confirm your public display name before commenting
Please logout and then login again, you will then be prompted to enter your display name.