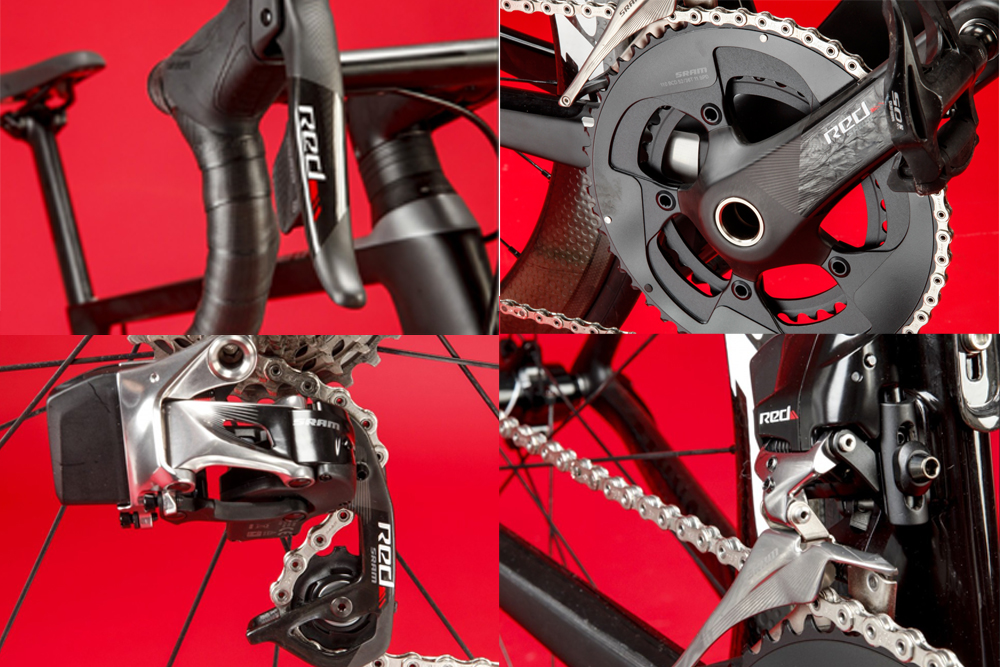
How to install SRAM Red eTap: step-by-step set-up guide
We guide you through the process of how to install SRAM Red eTap

SRAM Red eTap is the revolutionary wireless groupset that could well revolutionise the groupset world. Apart from the flawless shifting, one of the best things about it is that it is incredibly simple to set up, easily within the capabilities of even the most ham-fisted of home mechanics.
With just a handful of basic tools you'll be able to install SRAM Red eTap to your bike and have it set up and shifting perfectly in well under an hour by following our step-by-step guide.
What you'll need
Allen keys (5mm, 4mm, 2.5mm, 2mm)
Allen keys sockets (5mm, 4mm)
Spanner (13mm)
Torque wrench
Cable cutters
Chain breaker
Grease
Carbon gripper paste
Step-by-step guide
1. Press and hold the function button on the rear derailleur until the green LED blinks slowly. Repeat this on the shifters and front derailleur. To complete pairing, either wait 30 seconds, or press and release the function button on the rear derailleur.
2. Install the shifters by sliding them onto the handlebars and tighten the clamp around the bars using a 5mm Allen key. If you need to adjust the reach of the levers, this can be done using a 2.5mm Allen key in the bolt towards the front of the shifter. Rotate it clockwise to reduce the reach, and anti-clockwise to increase.
>>> How to build your new bike
If you're using blips then this is a good time to fit them. Simply remove the red protective cap from the socket, then plug in the blip, and attach to the bars using electrical tape.
3. Next fit the brake calipers. Gently tighten the bolt that attaches the caliper to the frame or fork. Measure a length of cable housing that is long enough so it can allow the handlebars to fully rotate, then fit the cable housing into the barrel adjuster on the caliper. Install the cable into the cable housing and into the groove behind the bolt at the side of the caliper. Squeeze the calipers so they are the desired distance from the rim, pull the cable so it is tight, then tighten the cable bolt to 6-8 Nm.
>>> How to set up your brakes (video)
Align the brake pads so there is at least 1mm between the top of the pads and the edge of the rim, make sure it is lined up parallel to the braking surface, then tighten. Next tighten the mounting bolt that attaches the brake to the frame or fork to 8-10Nm using a 5mm Allen key. Finally adjust the barrel adjuster until you achieve the desired space between pads and the rim.
4. To install the front derailleur, first shift it into the position it would be in if the chain was in teh big ring. This can be done using either the shifters, or by pushing the function button on the derailleur.
If you're using a clamp mount, first apply carbon gripper paste to the inside of the clamp, then attach to the seat tube using a 4mm Allen key. Attach the derailleur to the mount to 5-7Nm. If you're using a braze-on attachment, then all you need to do is attach the derailleur.
>>> Are you using your bike's gears efficiently?
Next, make sure that the derailleur is properly positioned. Line up the tip of the tooth at the top of the chain with the groove on the inside of the derailleur, and line up the front chainring with the grooves on the front and rear of the derailleur. If you've done this correctly, then there should be a 1-2mm gap between the top of the teeth on the chainring and the bottom edge of the outside of the derailleur cage.
On some frames you will also need to use a small bracing wedge that slots in between the frame and the front derailleur to hold it securely, although this wasn't necessary on the Canyon Aeroad shown int he video above.
5. Next, you need to install the rear derailleur. Unlike the front derailleur, you need to start with the rear derailleur in the same position as if you were in the largest sprocket on your cassette. First use a 5mm Allen key to attach the derailleur to the derailleur hanger to a tightness of 5-7Nm.
>>> Saddle height: how to get it right, and why it's so important (video)
The goal is to have the jockey wheel perfectly aligned with the teeth on the largest sprocket. To micro-adjust the derailleur away from the wheel, hold down the function button on the right shifter while simultaneously pushing the shifter. To move the derailleur in the other direction, do the same with the left shifter.
Use a 2.5mm Allen key to turn the B-Adjust screw, which is located on the side of the derailleur just to the left of the battery housing, to adjust the distance between the jockey wheels and the cassette. You should be looking to have a 6-8mm gap between the bottom of the cassette and the top of the jockey wheels.
>>> Handlebar reach: how to get it right (video)
The same tool is used to adjust the limits of the derailleur. The low limit will govern how far the derailleur can shift towards the wheel, with the adjustment screw located just below the battery housing. You should adjust this so it just lightly touches the derailleur arm.
To do the same with the high limit, first shift the derailleur so it is lined up with the smallest sprocket on the cassette, then adjust the high limit screw (located to the right of the battery housing) so it also lightly touches the derailleur arm.
6. Next, you need to install the chain. Wrap the chain around the large chainring and the biggest rear sprocket. From where the chain meets add one outer link and one inner link. Remove any surplus links using a chain breaker.
>>> How to change your chain (video)
Move the chain into the smallest rear sprocket, route it through the rear derailleur, then connect the two ends using a SRAM PowerLock, or, if you are using a Shimano chain, then with a connecting pin.
7. While the rear derailleur is now properly adjusted, you still need to do the same with the front derailleur. To start shift the chain into the big chainring and the smallest sprocket of the cassette.
The first step is to adjust the high limit screw. This is located on the outside of the front derailleur arm, just below the "Red" logo. Using a 2.5mm Allen key turn it clockwise to move the derailleur inwards, and anti-clockwise to move it outwards, until you have a 0.5mm gap between the outside of the derailleur cage and the chain.
>>> Seven essentials you need to take on every ride
To adjust the low limit, shift the chain into the small chainring and the largest sprocket. The low limit screw is also located on the outside of the derailleur arm, just below the high limit screw. The low limit screw is threaded in the other direction to the high limit screw, so you will need to turn it clockwise to move it away from the frame, and anti-clockwise to move it in the other direction. You should be aiming for a 0.5-1mm gap between the chain and the derailleur cage.
8. Finally, you might need to micro-adjust the rear derailleur to achieve perfect shifting. To move the rear derailleur outwards press the function button on the right derailleur while simultaneously pushing the shifter, and to move the derailleur inwards do the same, but on the left shifter. It is possible that the micro-adjustment might be too small for you to see it, so look out for the light on the rear derailleur to blink to be sure that an adjustment has occured.

Thank you for reading 20 articles this month* Join now for unlimited access
Enjoy your first month for just £1 / $1 / €1
*Read 5 free articles per month without a subscription

Join now for unlimited access
Try first month for just £1 / $1 / €1
Get The Leadout Newsletter
The latest race content, interviews, features, reviews and expert buying guides, direct to your inbox!
Henry Robertshaw began his time at Cycling Weekly working with the tech team, writing reviews, buying guides and appearing in videos advising on how to dress for the seasons. He later moved over to the news team, where his work focused on the professional peloton as well as legislation and provision for cycling. He's since moved his career in a new direction, with a role at the Department for Environment, Food and Rural Affairs.
-
 Why the silence? Are there really no gay riders in the men's pro peloton?
Despite growing LGBTQ+ visibility in other sports, representation in male pro cycling remains entirely absent. David Bradford speaks to British racers and asks, why the stubborn silence?
By David Bradford
-
 Tadej Pogačar's hat-trick, La Redoute, and Dutch delight: Five things to look out for at Liège-Bastogne-Liège 2025
The oldest professional bike race in the world takes place this Sunday – here's how to watch, who to watch, and what to watch out for
By Adam Becket